
Auth0
Overview
Using Auth0, developers can connect any application written in any language or stack, and define the external identity providers, as well as integrations, that they want to use. This short Auth0 product demo gives an overview of this process, touching upon Auth0’s unmatched extensibility and its applicability to B2B, B2C, and B2E use cases.
Documentation
This guide steps through building a Next.js application with Auth0 and Supabase. We configure Auth0 to handle authenticating users and managing tokens, while writing our authorization logic in Supabase - using Row Level Security policies.
Note: This guide is heavily inspired by the Using Next.js and Auth0 with Supabase article on Auth0's blog. Check it out for a practical step-by-step guide on integrating Auth0 and Supabase.
The full code example for this guide can be found here.
Auth0 is an authentication and authorization platform, offering numerous strategies to authenticate and manage users. It provides fine-grain control over how users sign in to your application, the token that is generated, and what data is stored about your users.
Next.js is a web application framework built on top of React. We will be using it for this example, as it allows us to write server-side logic within our application. Auth0 have also written a very well integrated authentication library specifically for Next.js.
Note: API routes (serverless functions) in Next.js closely resemble the structure of Node server frameworks - such as Express, Koa and Fastify. The server-side logic in this guide could easily be refactored in one of these frameworks and managed as a separate application to the front-end.
If you don’t have an Auth0 account, create one here.
You will also need a Supabase account, which can be created by signing in here.
Step 1: Creating an Auth0 tenant
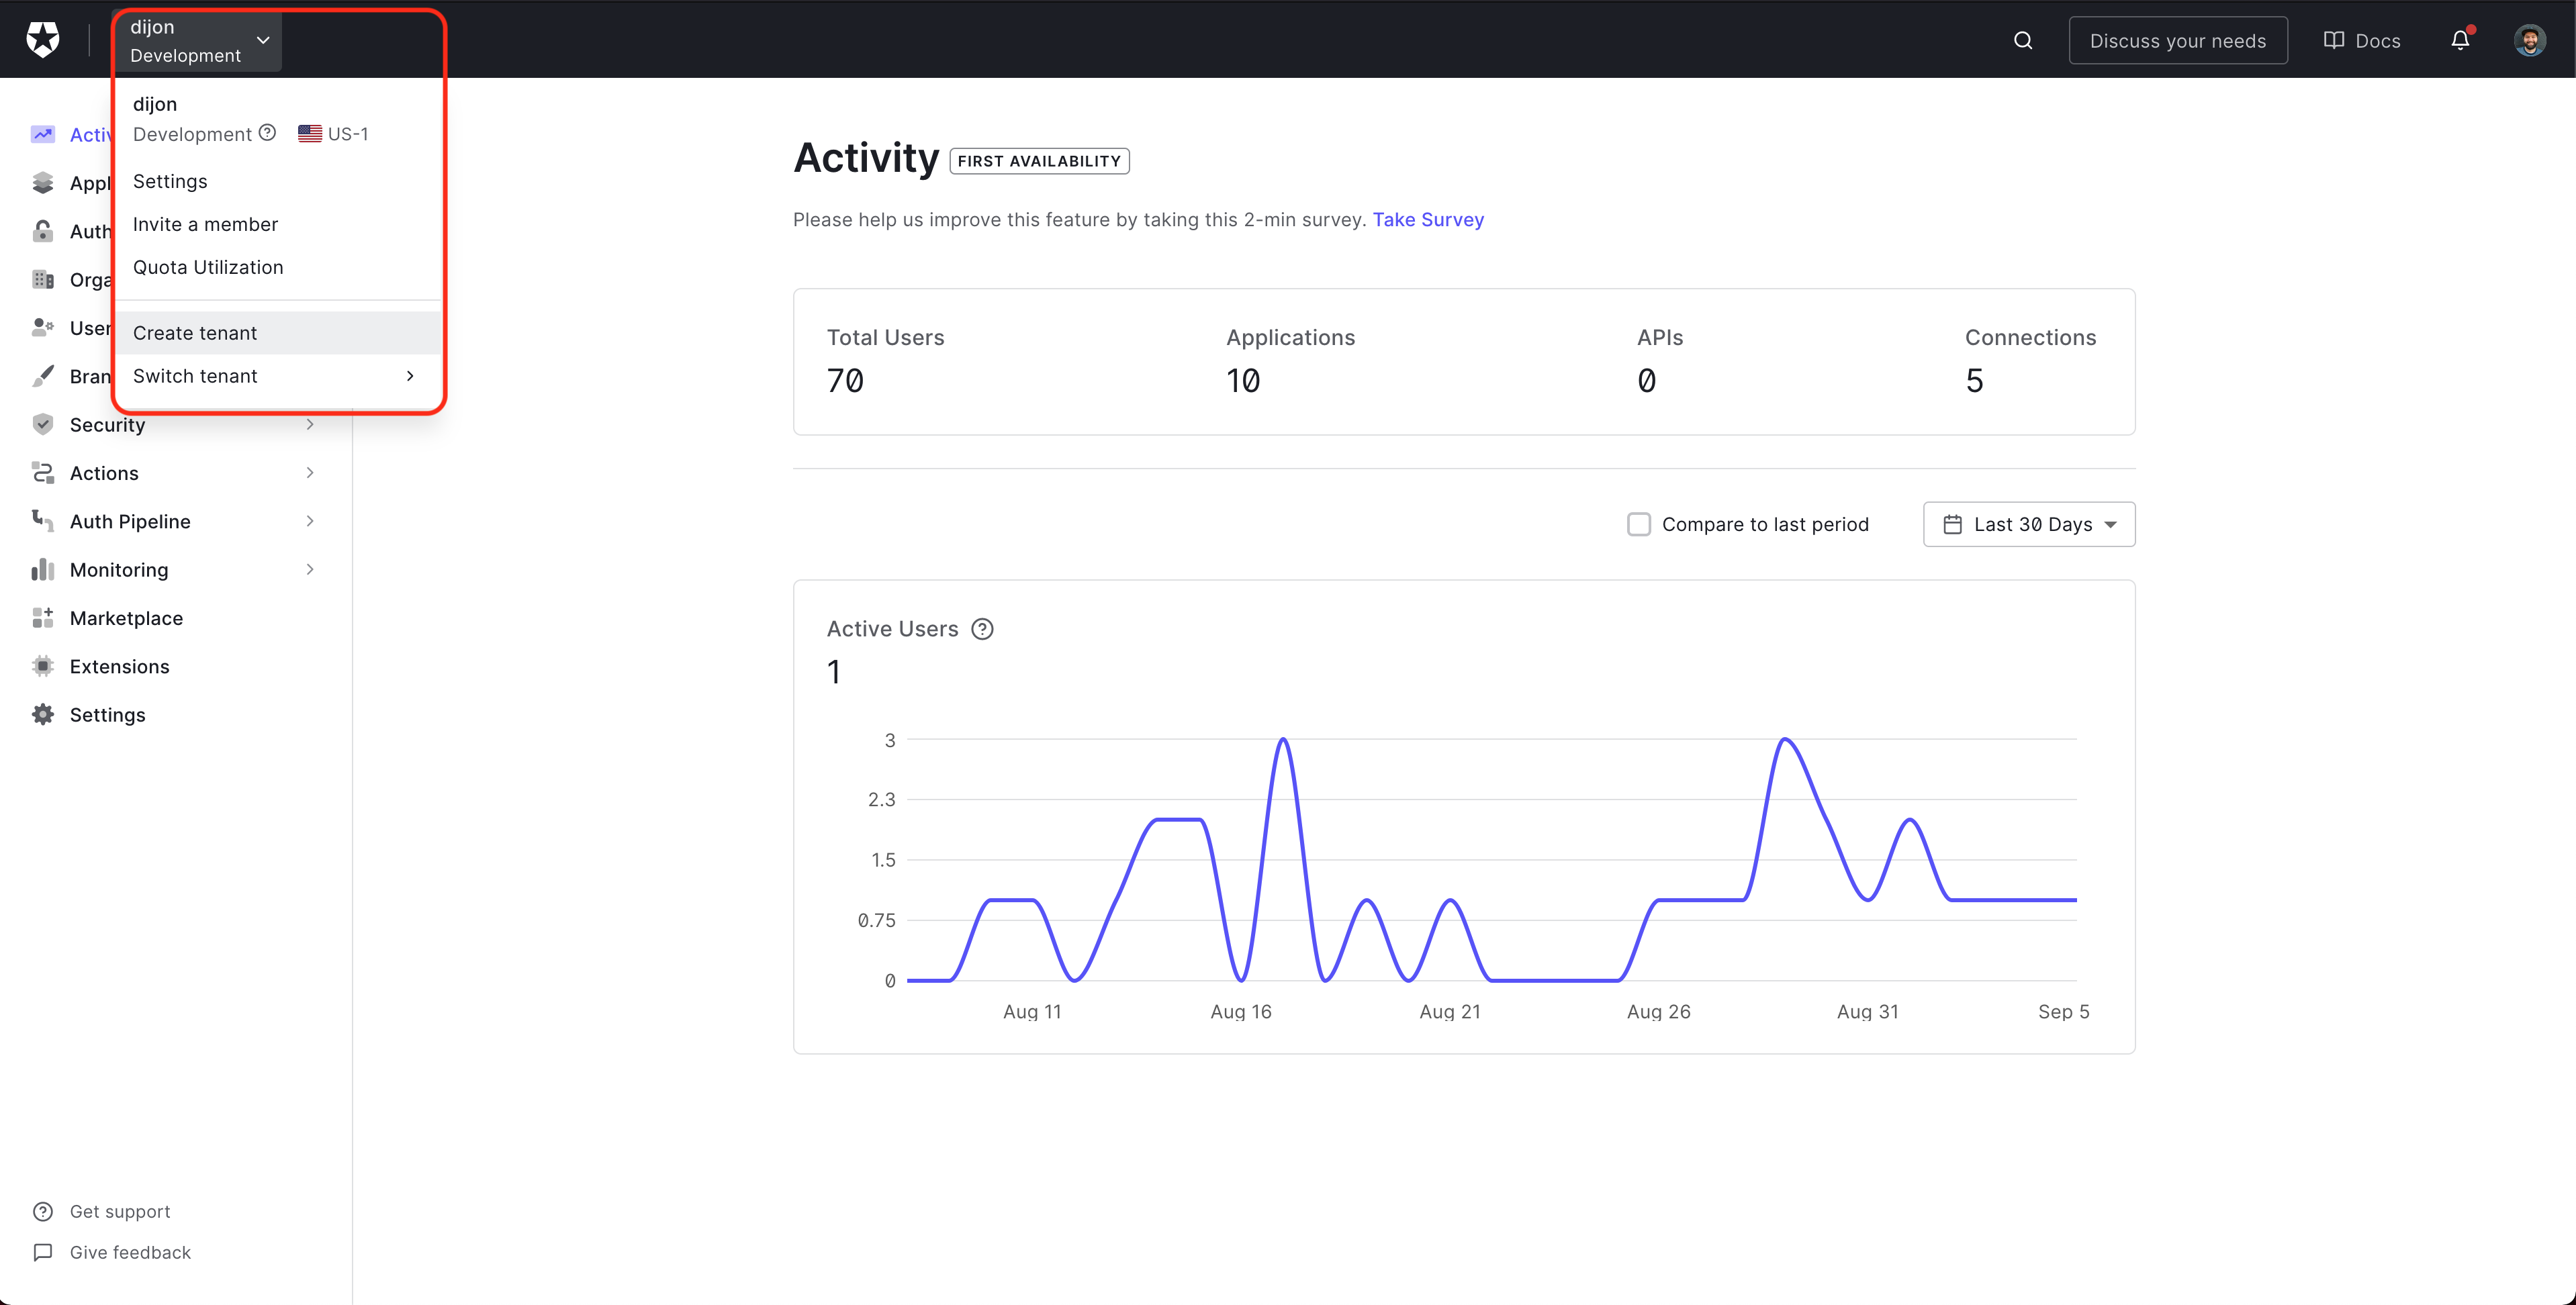
From the Auth0 dashboard, click the menu to the right of the Auth0 logo, and select Create tenant.
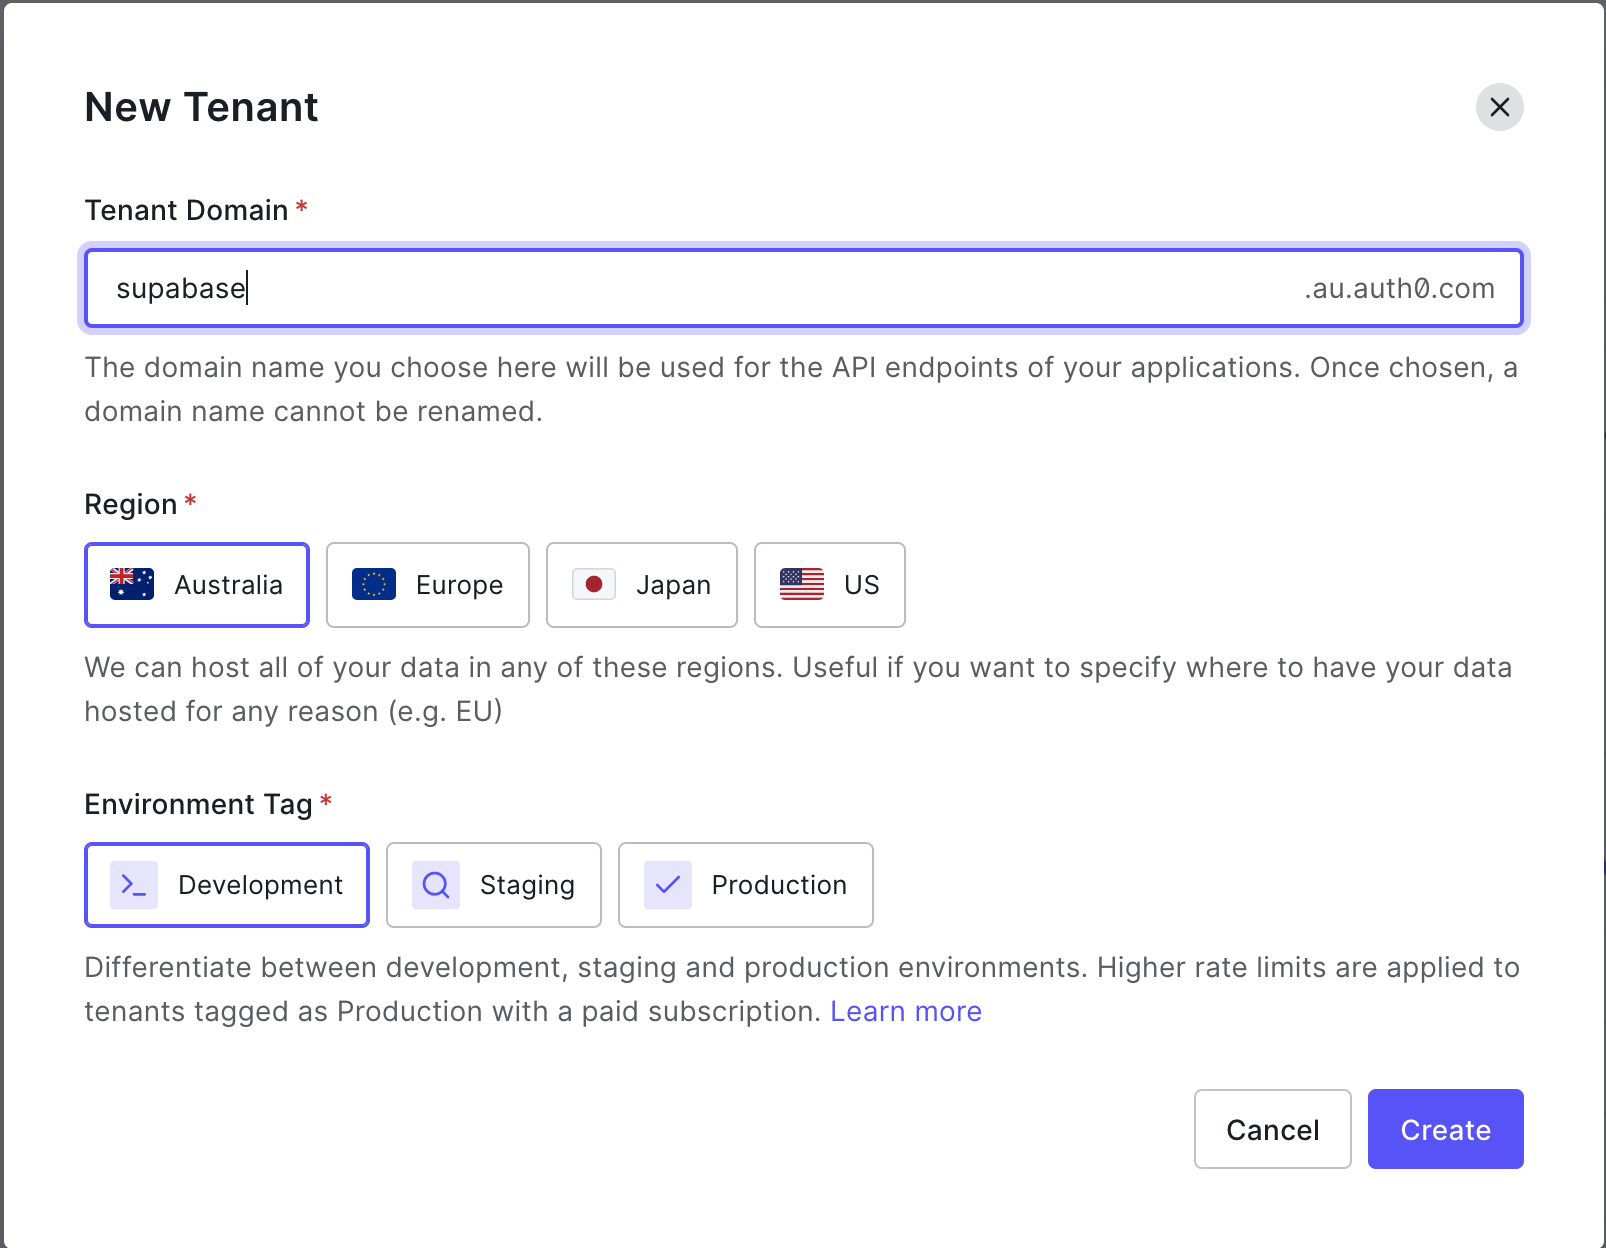
Enter a Domain for your tenant - this will need to be unique.
Select a Region - this should be geographically close to the majority of your users.
Select Development for Environment Tag - this should be production when you're ready to go live.
Step 2: Setting up an Auth0 application
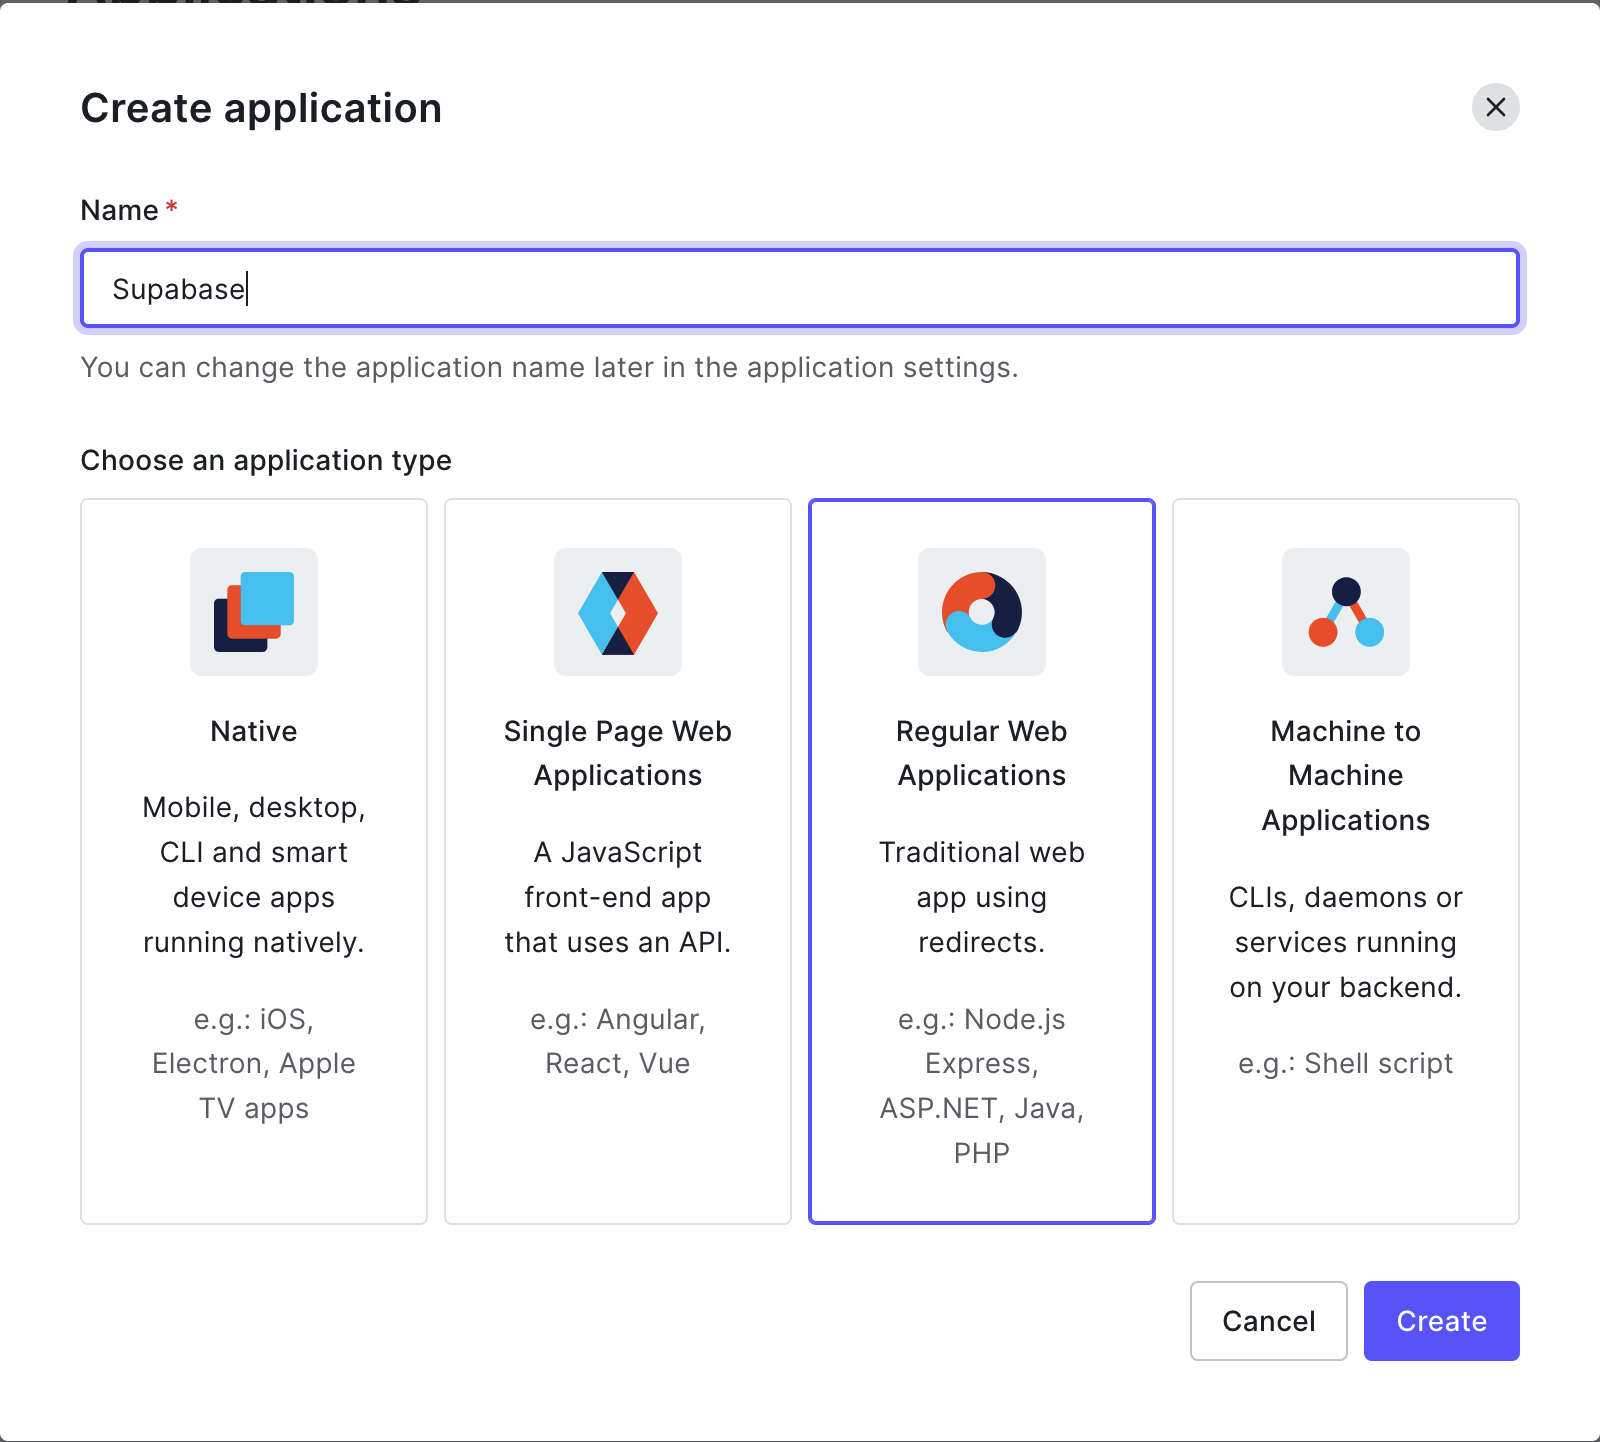
From the sidebar menu, select Applications > Applications and click Create Application.
Give your application a name, select the Regular Web Applications option and click Create.
Select Settings and navigate to the Application URIs section, and update the following:
Allowed Callback URLs: http://localhost:3000/api/auth/callback
Allowed Logout URLs: http://localhost:3000
Scroll to the bottom of the Settings section and reveal the Advanced Settings.
Select OAuth and set JSON Web Token Signature to RS256.
Confirm OIDC Conformant is Enabled.
Click Save to update the settings.
Step 3: Creating a Supabase project
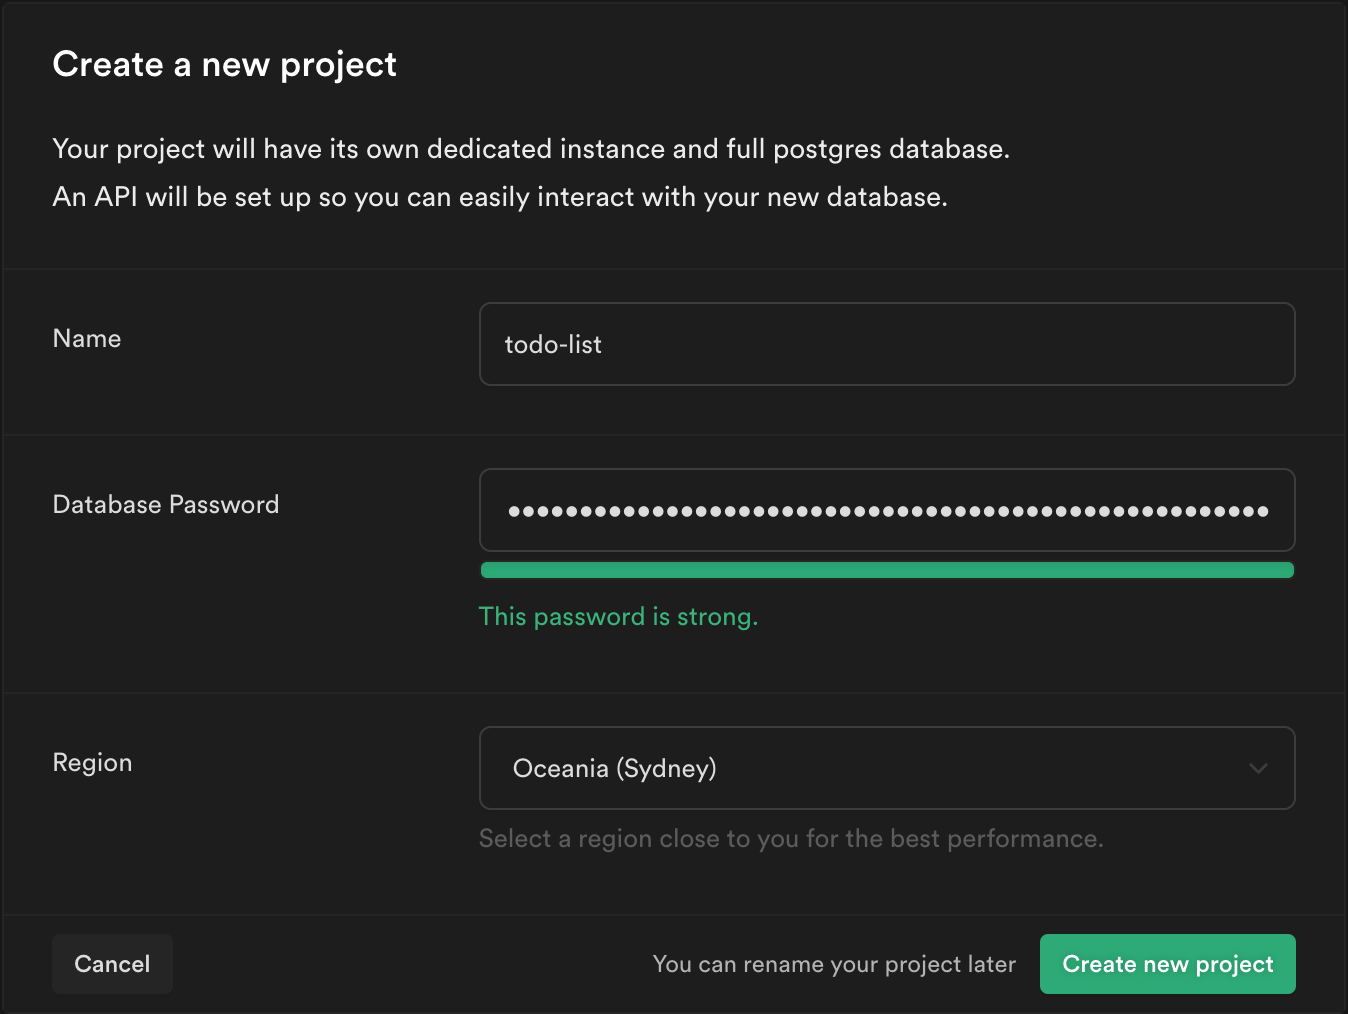
From your Supabase dashboard, click New project.
Enter a Name for your Supabase project.
Enter a secure Database Password.
Select the same Region you selected for your Auth0 tenant.
Click Create new project.
Step 4: Creating data in Supabase
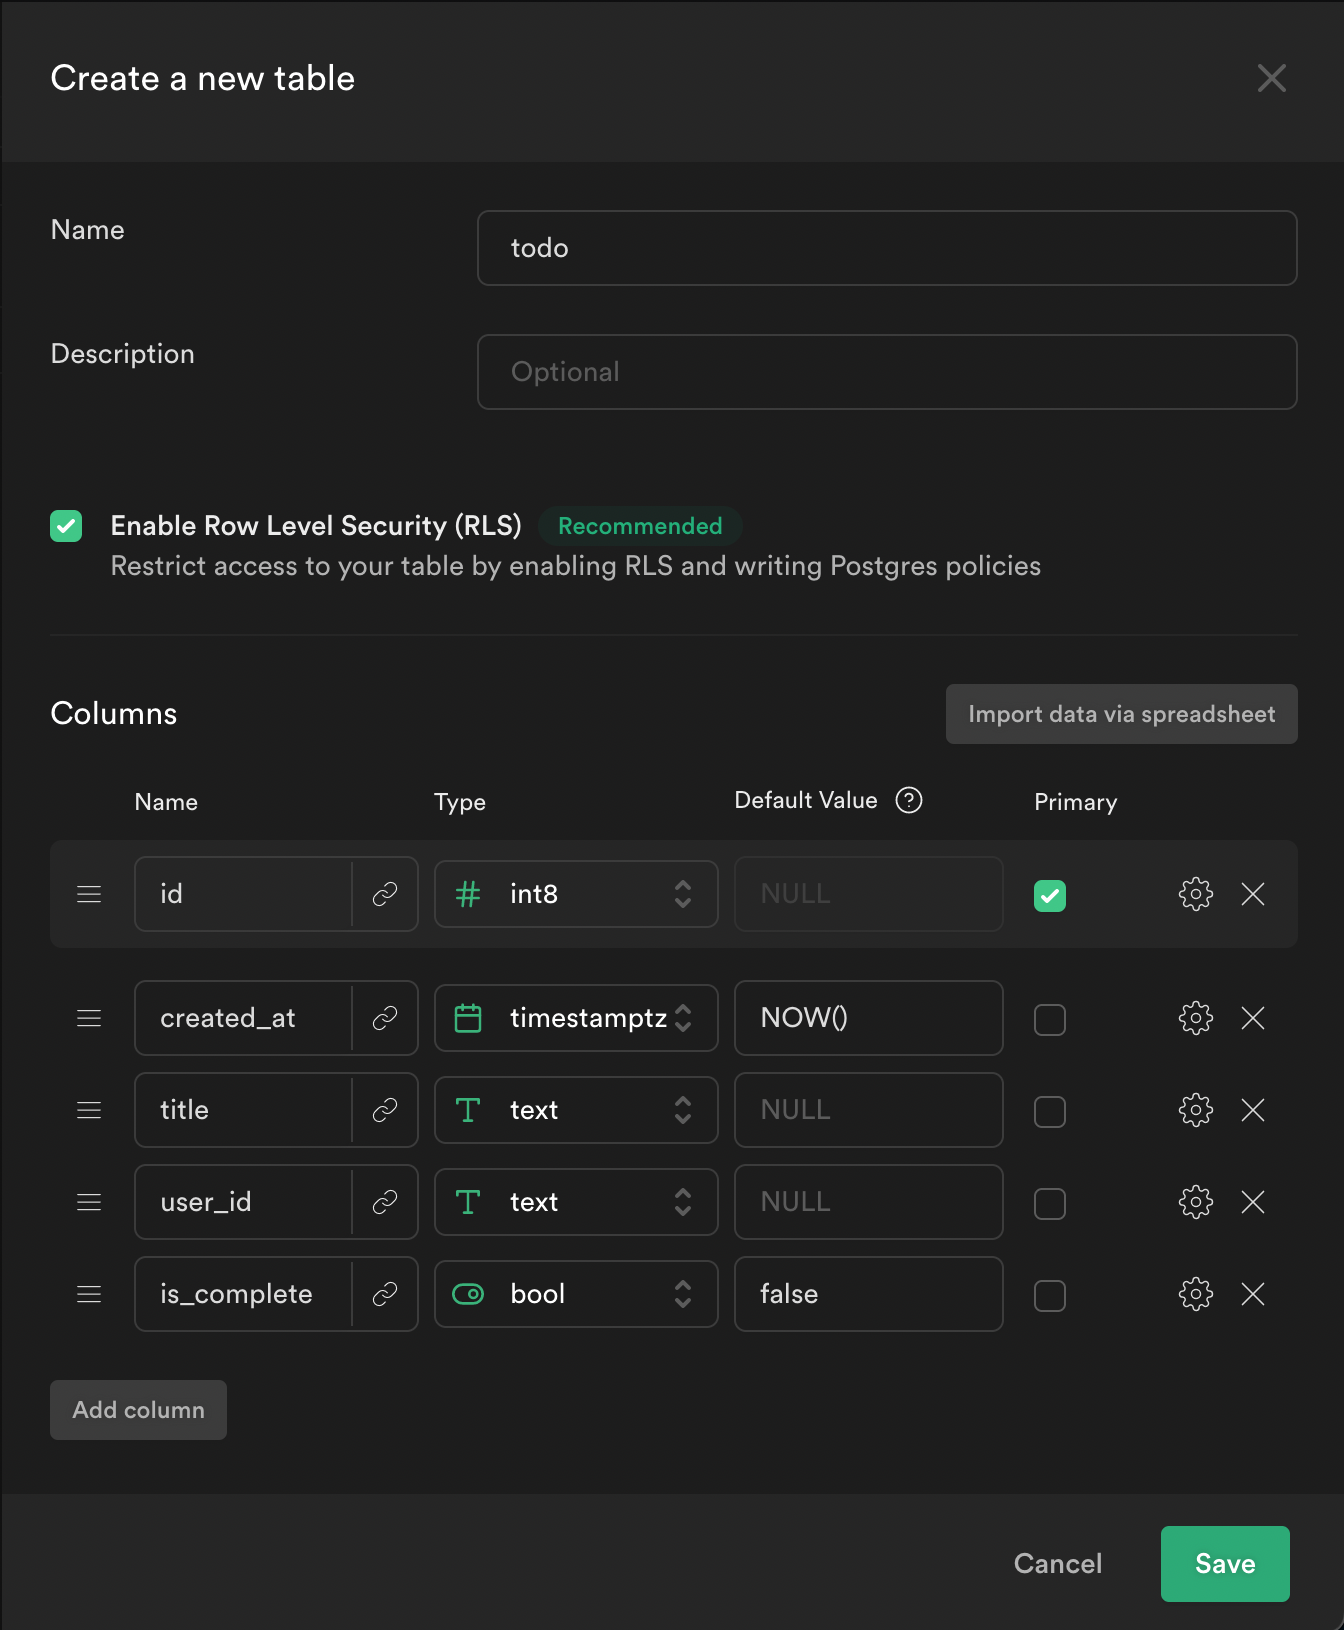
From the sidebar menu in the Supabase dashboard, click Table editor, then New table.
Enter todo as the Name field.
Select Enable Row Level Security (RLS).
Create two new columns:
titleastextuser_idastextis_completeasboolwith the default valuefalse
Click Save to create the new table.
From the Table editor view, select the todo table and click Insert row.
Fill out the title field and click Save.
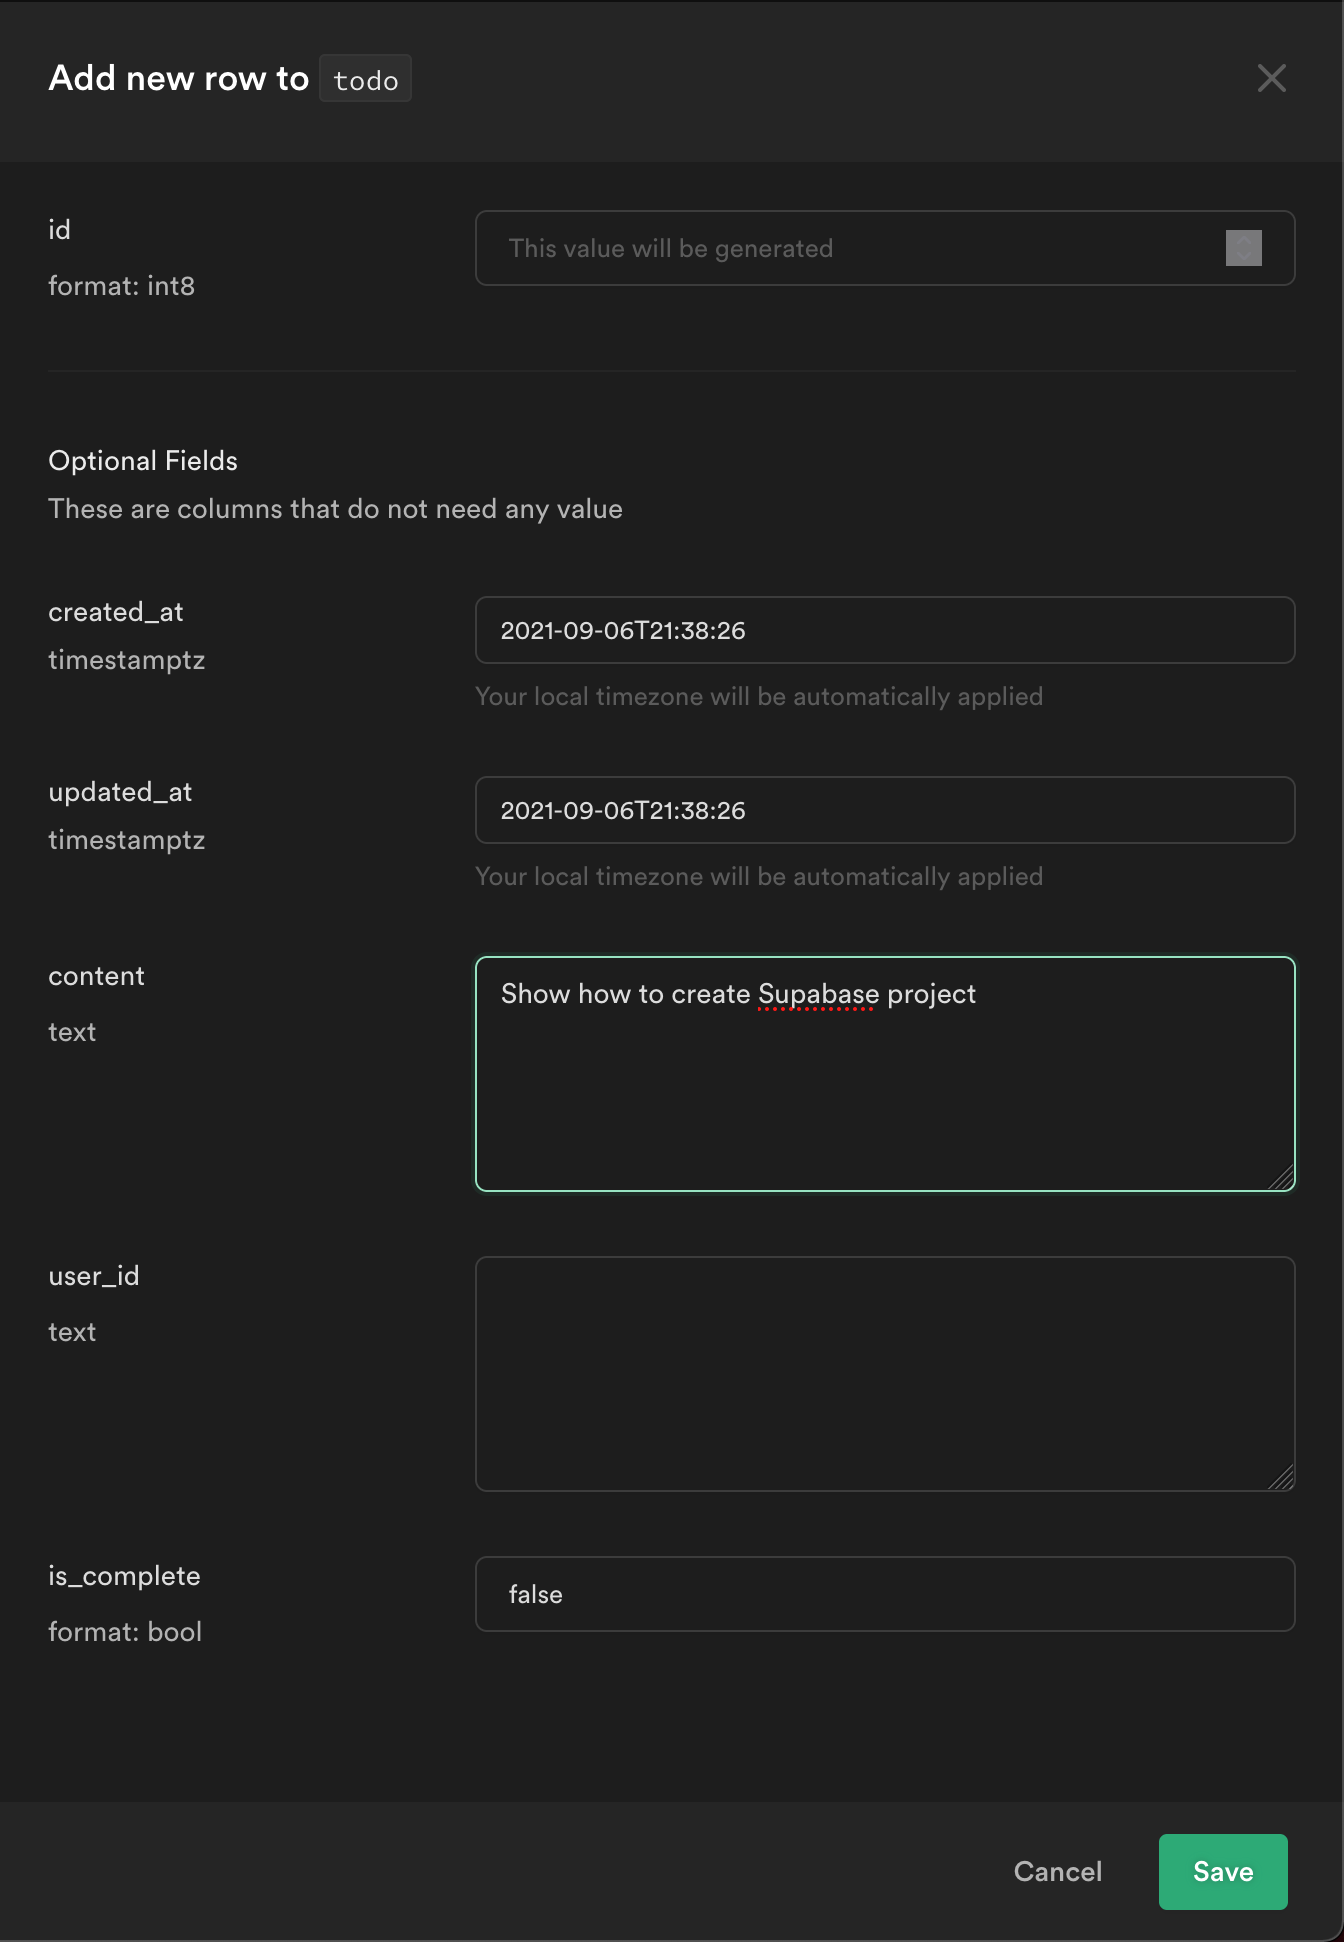
Click Insert row and add a couple of extra todos.
Step 5: Building a Next.js app
Create a new Next.js project:
_10npx create-next-app <name-of-project>
Create a .env.local file and enter the following values:
_10AUTH0_SECRET=any-secure-value_10AUTH0_BASE_URL=http://localhost:3000_10AUTH0_ISSUER_BASE_URL=https://<name-of-your-tenant>.<region-you-selected>.auth0.com_10AUTH0_CLIENT_ID=get-from-auth0-dashboard_10AUTH0_CLIENT_SECRET=get-from-auth0-dashboard_10NEXT_PUBLIC_SUPABASE_URL=get-from-supabase-dashboard_10NEXT_PUBLIC_SUPABASE_ANON_KEY=get-from-supabase-dashboard_10SUPABASE_JWT_SECRET=get-from-supabase-dashboard
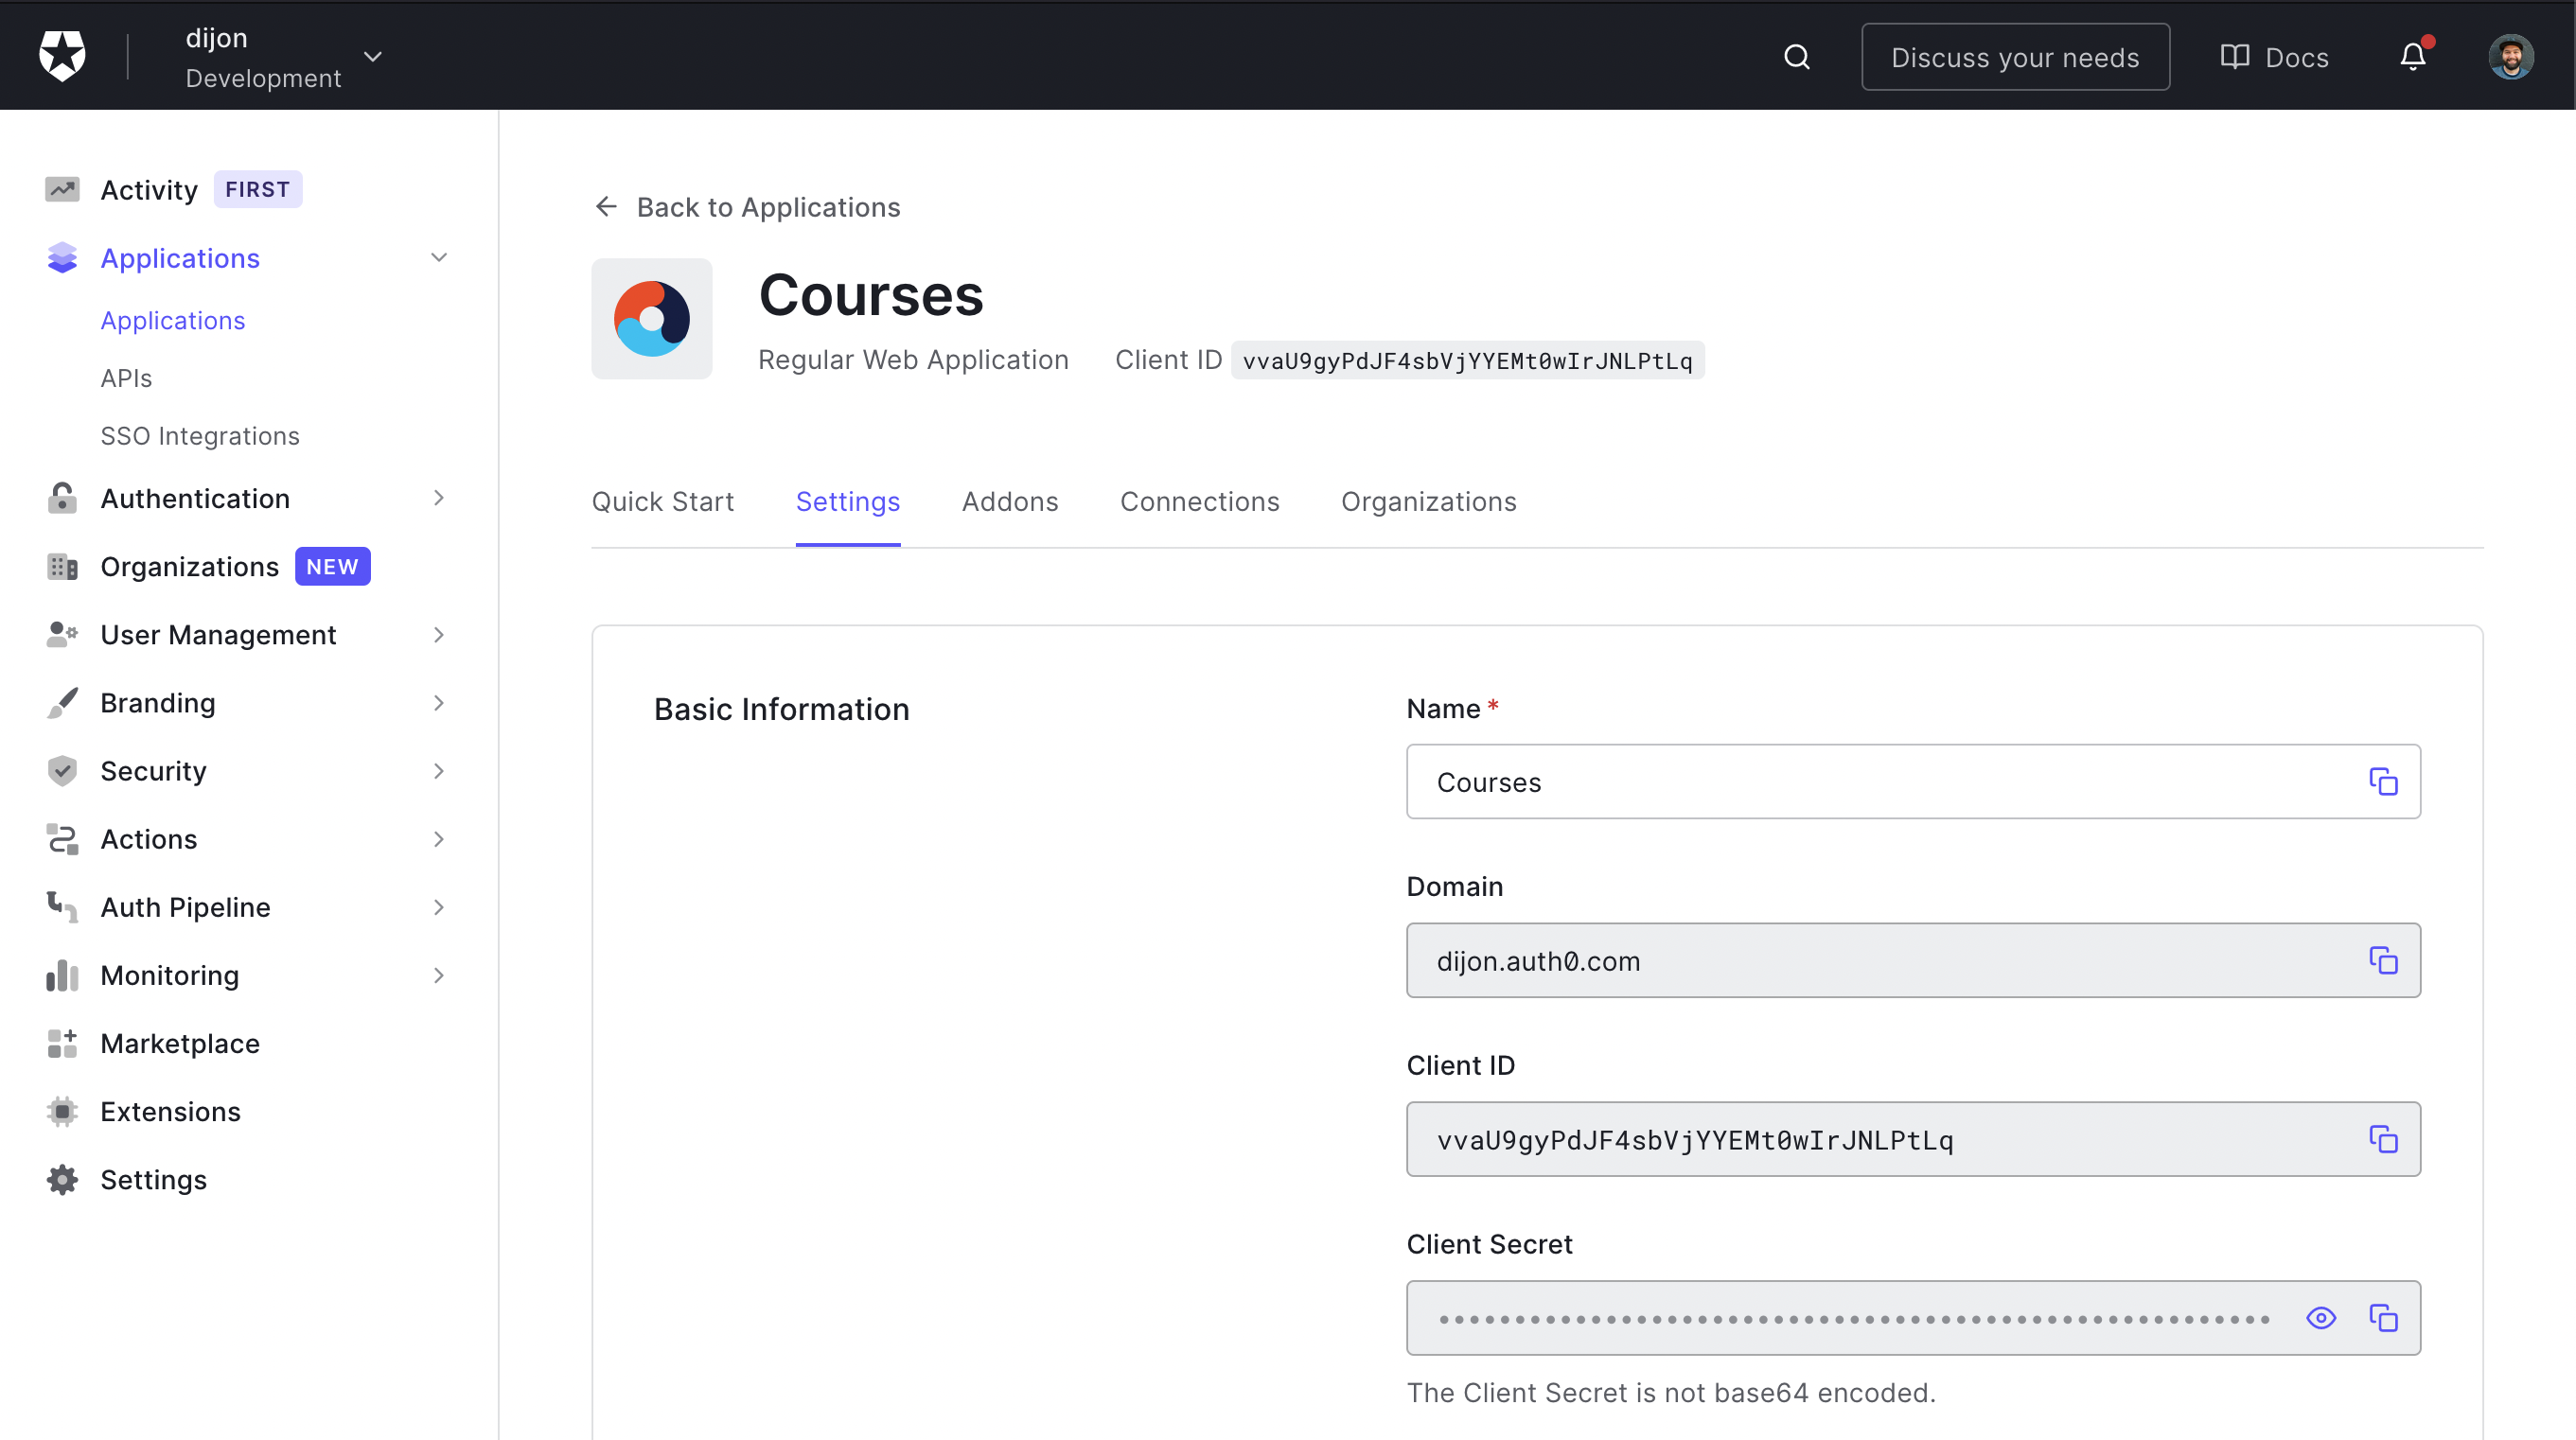
Note: Auth0 values can be found under
Settings > Basic Informationfor your application.
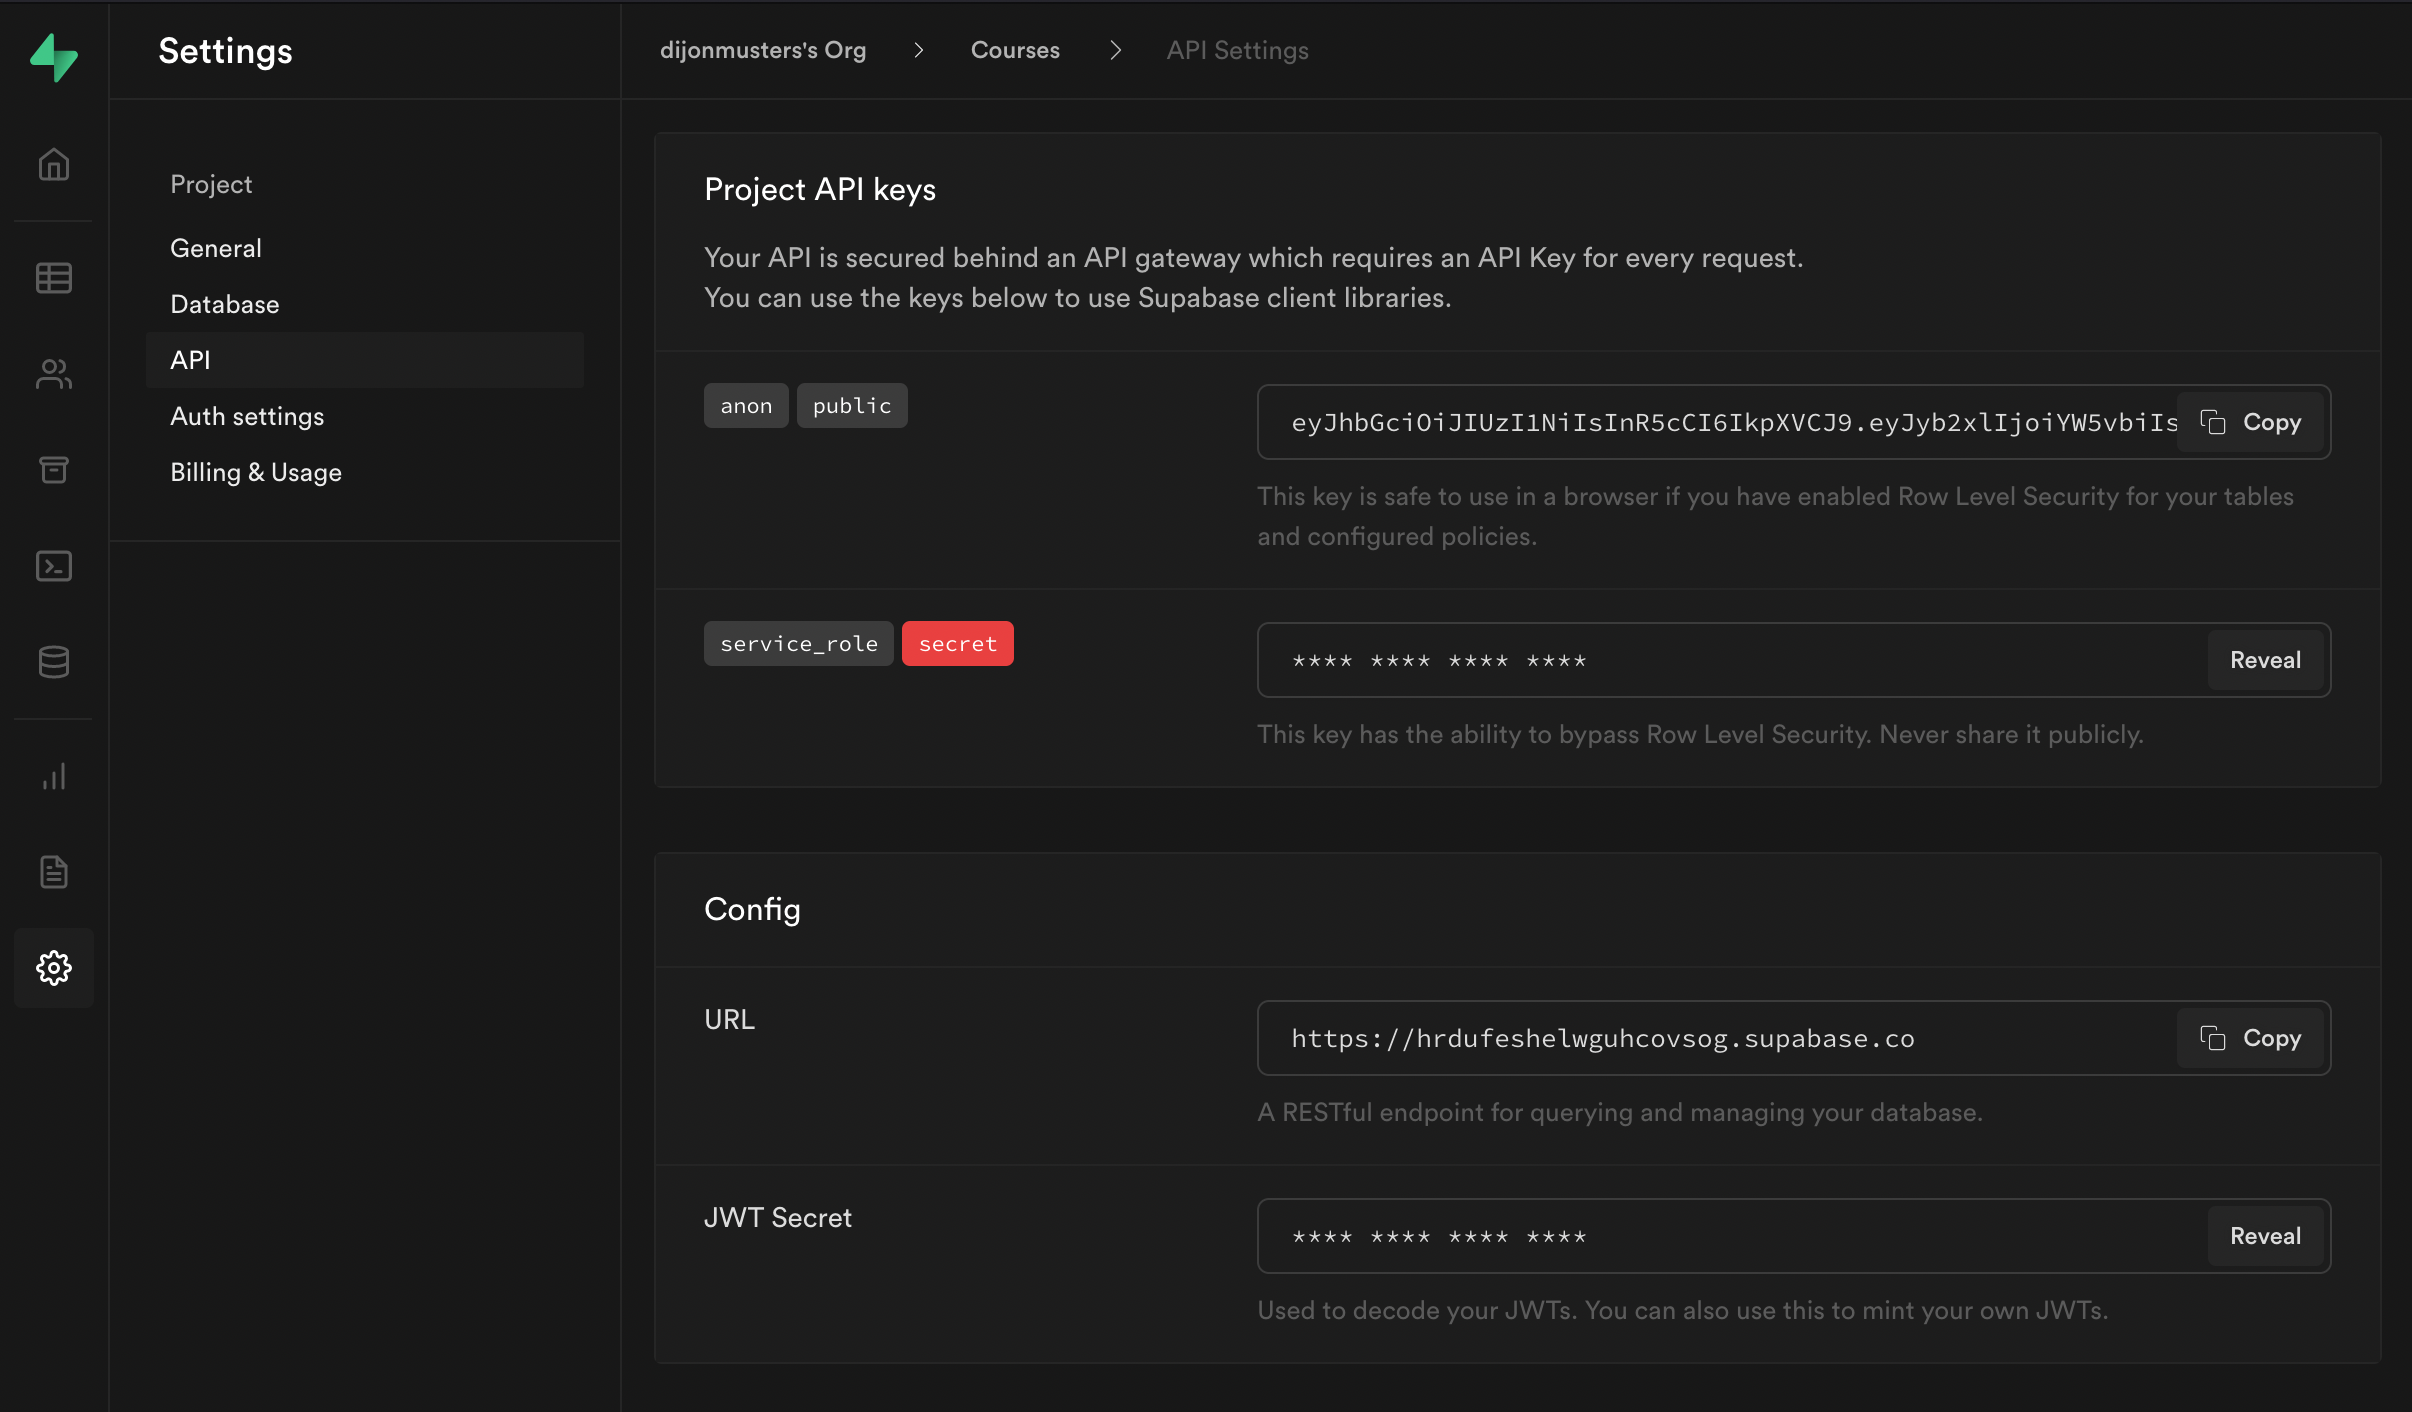
Note: Supabase values can be found under
Settings > APIfor your project.
Restart your Next.js development server to read in the new values from .env.local.
_10npm run dev
Step 6: Install Auth0 Next.js library
Install the @auth0/nextjs-auth0 library.
_10npm i @auth0/nextjs-auth0
Create a new file pages/api/auth/[...auth0].js and add:
_10// pages/api/auth/[...auth0].js_10_10import { handleAuth } from '@auth0/nextjs-auth0'_10_10export default handleAuth()
Note: This will create a few API routes for us. The main ones we will use are
/api/auth/loginand/api/auth/logoutto handle signing users in and out.
Open pages/_app.js and wrap our Component with the UserProvider from Auth0:
_14// pages/_app.js_14_14import React from 'react'_14import { UserProvider } from '@auth0/nextjs-auth0/client'_14_14const App = ({ Component, pageProps }) => {_14 return (_14 <UserProvider>_14 <Component {...pageProps} />_14 </UserProvider>_14 )_14}_14_14export default App
Update pages/index.js to ensure the user is logged in to view the landing page.
_22// pages/index.js_22_22import styles from '../styles/Home.module.css'_22import { withPageAuthRequired } from '@auth0/nextjs-auth0'_22import Link from 'next/link'_22_22const Index = ({ user }) => {_22 return (_22 <div className={styles.container}>_22 <p>_22 Welcome {user.name}!{' '}_22 <Link href="/api/auth/logout">_22 <a>Logout</a>_22 </Link>_22 </p>_22 </div>_22 )_22}_22_22export const getServerSideProps = withPageAuthRequired()_22_22export default Index
Note:
withPageAuthRequiredwill automatically redirect the user to/api/auth/loginif they are not currently logged in.
Test this is working by navigating to http://localhost:3000 which should redirect you to an Auth0 sign in screen.
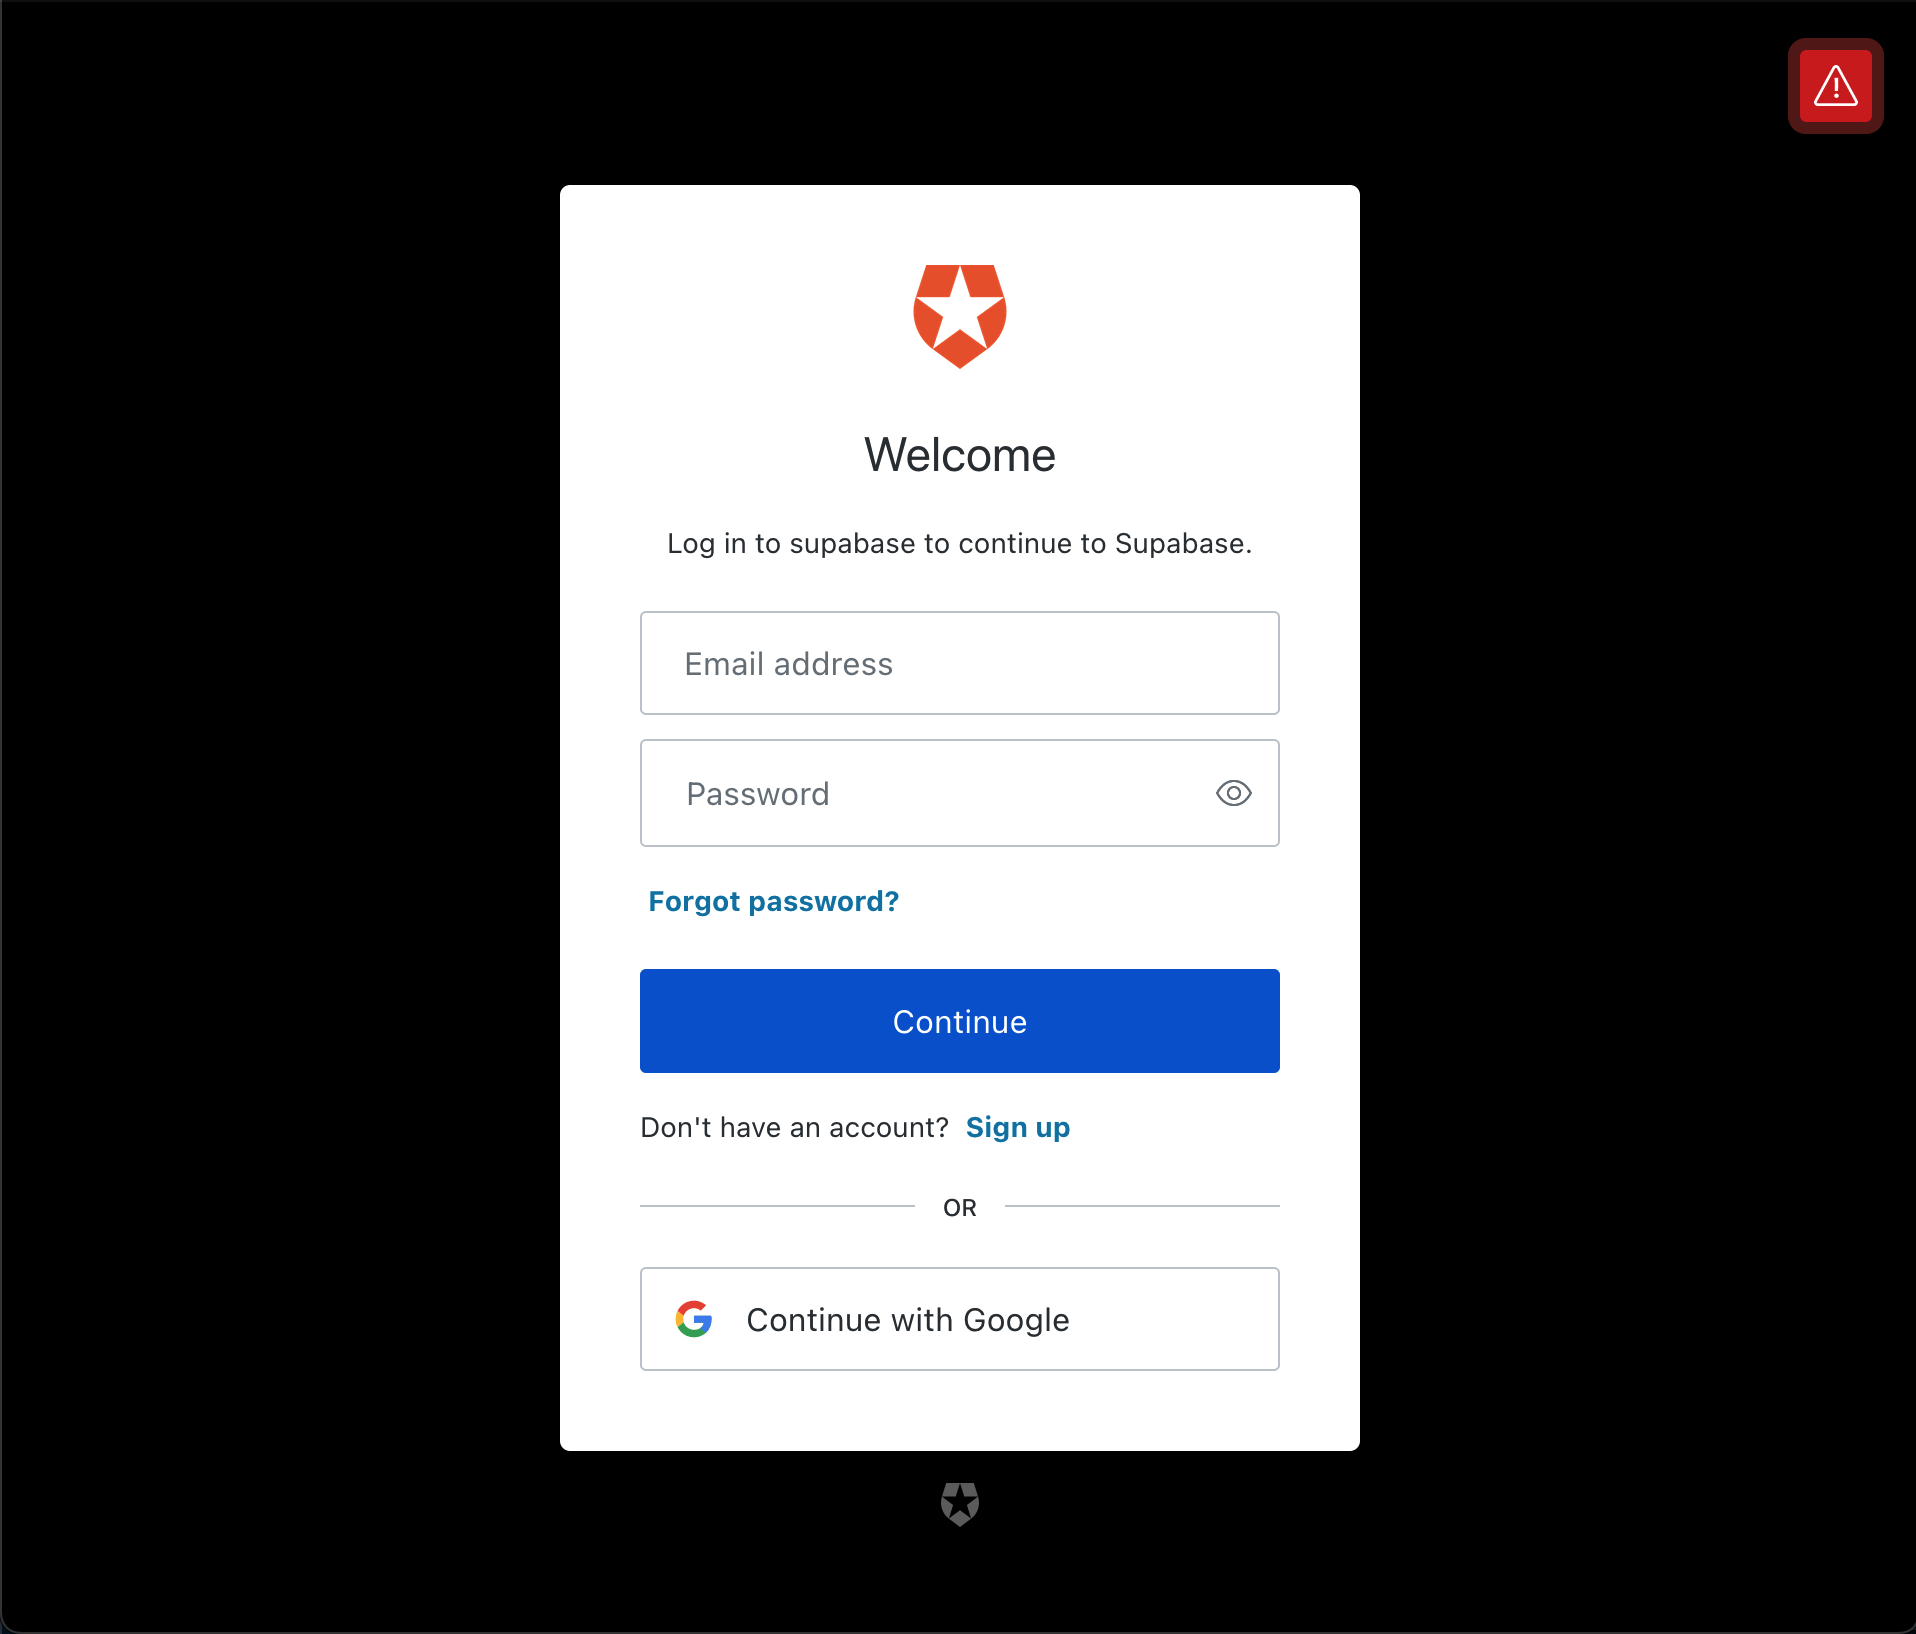
Either Sign up for a new account, or click Continue with Google to sign in.
You should now be able to view the landing page.

Step 7: Sign Auth0 token for Supabase
Currently, neither Supabase or Auth0 allow for a custom signing secret to be set for their JWT. They also use different signing algorithms.
Therefore, we need to extract the bits we need from Auth0's JWT, and sign our own to send to Supabase.
We can do that using Auth0's afterCallback function, which gets called anytime the user authenticates.
Install the jsonwebtoken library.
_10npm i jsonwebtoken
Update pages/api/auth/[...auth0].js with the following:
_25// pages/api/auth/[...auth0].js_25_25import { handleAuth, handleCallback } from '@auth0/nextjs-auth0'_25import jwt from 'jsonwebtoken'_25_25const afterCallback = async (req, res, session) => {_25 const payload = {_25 userId: session.user.sub,_25 exp: Math.floor(Date.now() / 1000) + 60 * 60,_25 }_25_25 session.user.accessToken = jwt.sign(payload, process.env.SUPABASE_JWT_SECRET)_25_25 return session_25}_25_25export default handleAuth({_25 async callback(req, res) {_25 try {_25 await handleCallback(req, res, { afterCallback })_25 } catch (error) {_25 res.status(error.status || 500).end(error.message)_25 }_25 },_25})
Our payload for the JWT will contain our user's unique identifier from Auth0 - session.user.sub and an expiry of 1 hour.
We are signing this JWT using Supabase's signing secret, so Supabase will be able to validate it is authentic and hasn't been tampered with in transit.
Note: We need to sign the user out and back in again to run the
afterCallbackfunction, and create our new token.
Now we just need to send the token along with the request to Supabase.
Step 8: Requesting data from Supabase
Create a new file called utils/supabase.js and add the following:
_25// utils/supabase.js_25_25import { createClient } from '@supabase/supabase-js'_25_25const getSupabase = (access_token) => {_25 const options = {}_25_25 if (access_token) {_25 options.global = {_25 headers: {_25 Authorization: `Bearer ${access_token}`,_25 },_25 }_25 }_25_25 const supabase = createClient(_25 process.env.NEXT_PUBLIC_SUPABASE_URL,_25 process.env.NEXT_PUBLIC_SUPABASE_ANON_KEY,_25 options_25 )_25_25 return supabase_25}_25_25export { getSupabase }
This will be our client for talking to Supabase. We can pass it an access_token and it will be attached to our request.
Let's load our todos from Supabase in our landing page!
_41// pages/index.js_41_41import styles from '../styles/Home.module.css'_41import { withPageAuthRequired } from '@auth0/nextjs-auth0'_41import { getSupabase } from '../utils/supabase'_41import Link from 'next/link'_41import { useEffect } from 'react'_41_41const Index = ({ user }) => {_41 const [todos, setTodos] = useState([])_41 const supabase = getSupabase(user.accessToken)_41_41 useEffect(() => {_41 const fetchTodos = async () => {_41 const { data } = await supabase.from('todo').select('*')_41 setTodos(data)_41 }_41_41 fetchTodos()_41 }, [])_41_41 return (_41 <div className={styles.container}>_41 <p>_41 Welcome {user.name}!{' '}_41 <Link href="/api/auth/logout">_41 <a>Logout</a>_41 </Link>_41 </p>_41 {todos?.length > 0 ? (_41 todos.map((todo) => <p key={todo.id}>{todo.content}</p>)_41 ) : (_41 <p>You have completed all todos!</p>_41 )}_41 </div>_41 )_41}_41_41export const getServerSideProps = withPageAuthRequired()_41_41export default Index
Alternatively, we could fetch todos on the server using the getServerSideProps function.
_42// pages/index.js_42_42import styles from '../styles/Home.module.css'_42import { withPageAuthRequired, getSession } from '@auth0/nextjs-auth0'_42import { getSupabase } from '../utils/supabase'_42import Link from 'next/link'_42_42const Index = ({ user, todos }) => {_42 return (_42 <div className={styles.container}>_42 <p>_42 Welcome {user.name}!{' '}_42 <Link href="/api/auth/logout">_42 <a>Logout</a>_42 </Link>_42 </p>_42 {todos?.length > 0 ? (_42 todos.map((todo) => <p key={todo.id}>{todo.content}</p>)_42 ) : (_42 <p>You have completed all todos!</p>_42 )}_42 </div>_42 )_42}_42_42export const getServerSideProps = withPageAuthRequired({_42 async getServerSideProps({ req, res }) {_42 const {_42 user: { accessToken },_42 } = await getSession(req, res)_42_42 const supabase = getSupabase(accessToken)_42_42 const { data: todos } = await supabase.from('todo').select('*')_42_42 return {_42 props: { todos },_42 }_42 },_42})_42_42export default Index
Either way, when we reload our application, we are still getting the empty state for todos.

This is because we enabled Row Level Security, which blocks all requests by default. To enable our user to select their todos we need to write a policy.
Step 9: Write a policy to allow select
Our policy will need to know who our currently logged in user is to determine whether or not they should have access. Let's create a PostgreSQL function to extract the current user from our new JWT.
Navigate back to the Supabase dashboard, select SQL from the sidebar menu, and click New query. This will create a new query called new sql snippet, which will allow us to run any SQL against our Postgres database.
Write the following and click Run.
_10create or replace function auth.user_id() returns text as $$_10 select nullif(current_setting('request.jwt.claims', true)::json->>'userId', '')::text;_10$$ language sql stable;
This will create a function called auth.user_id(), which will inspect the userId field of our JWT payload.
Note: To learn more about PostgreSQL functions, check out our deep dive video.
Let's create a policy that checks whether this user is the owner of the todo.
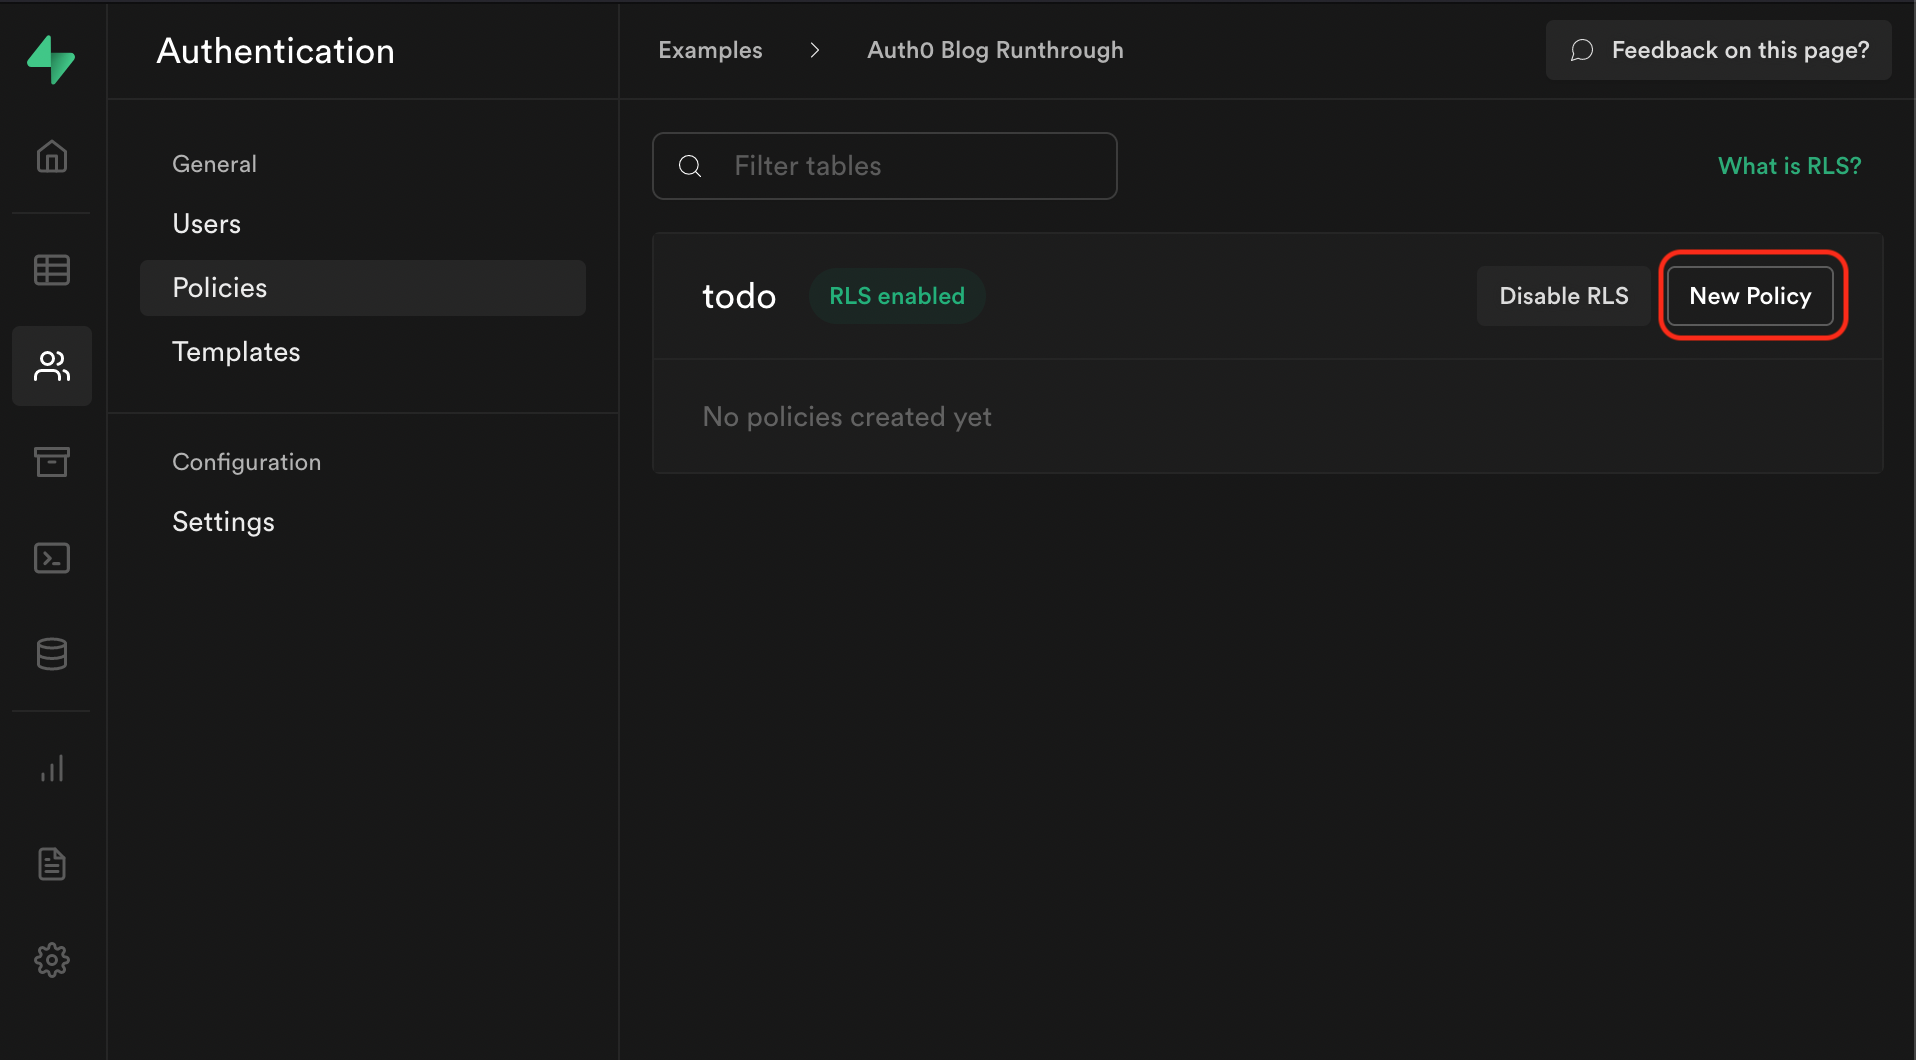
Select Authentication from the Supabase sidebar menu, click Policies, and then New Policy on the todo table.
From the modal, select Create a policy from scratch and add the following.
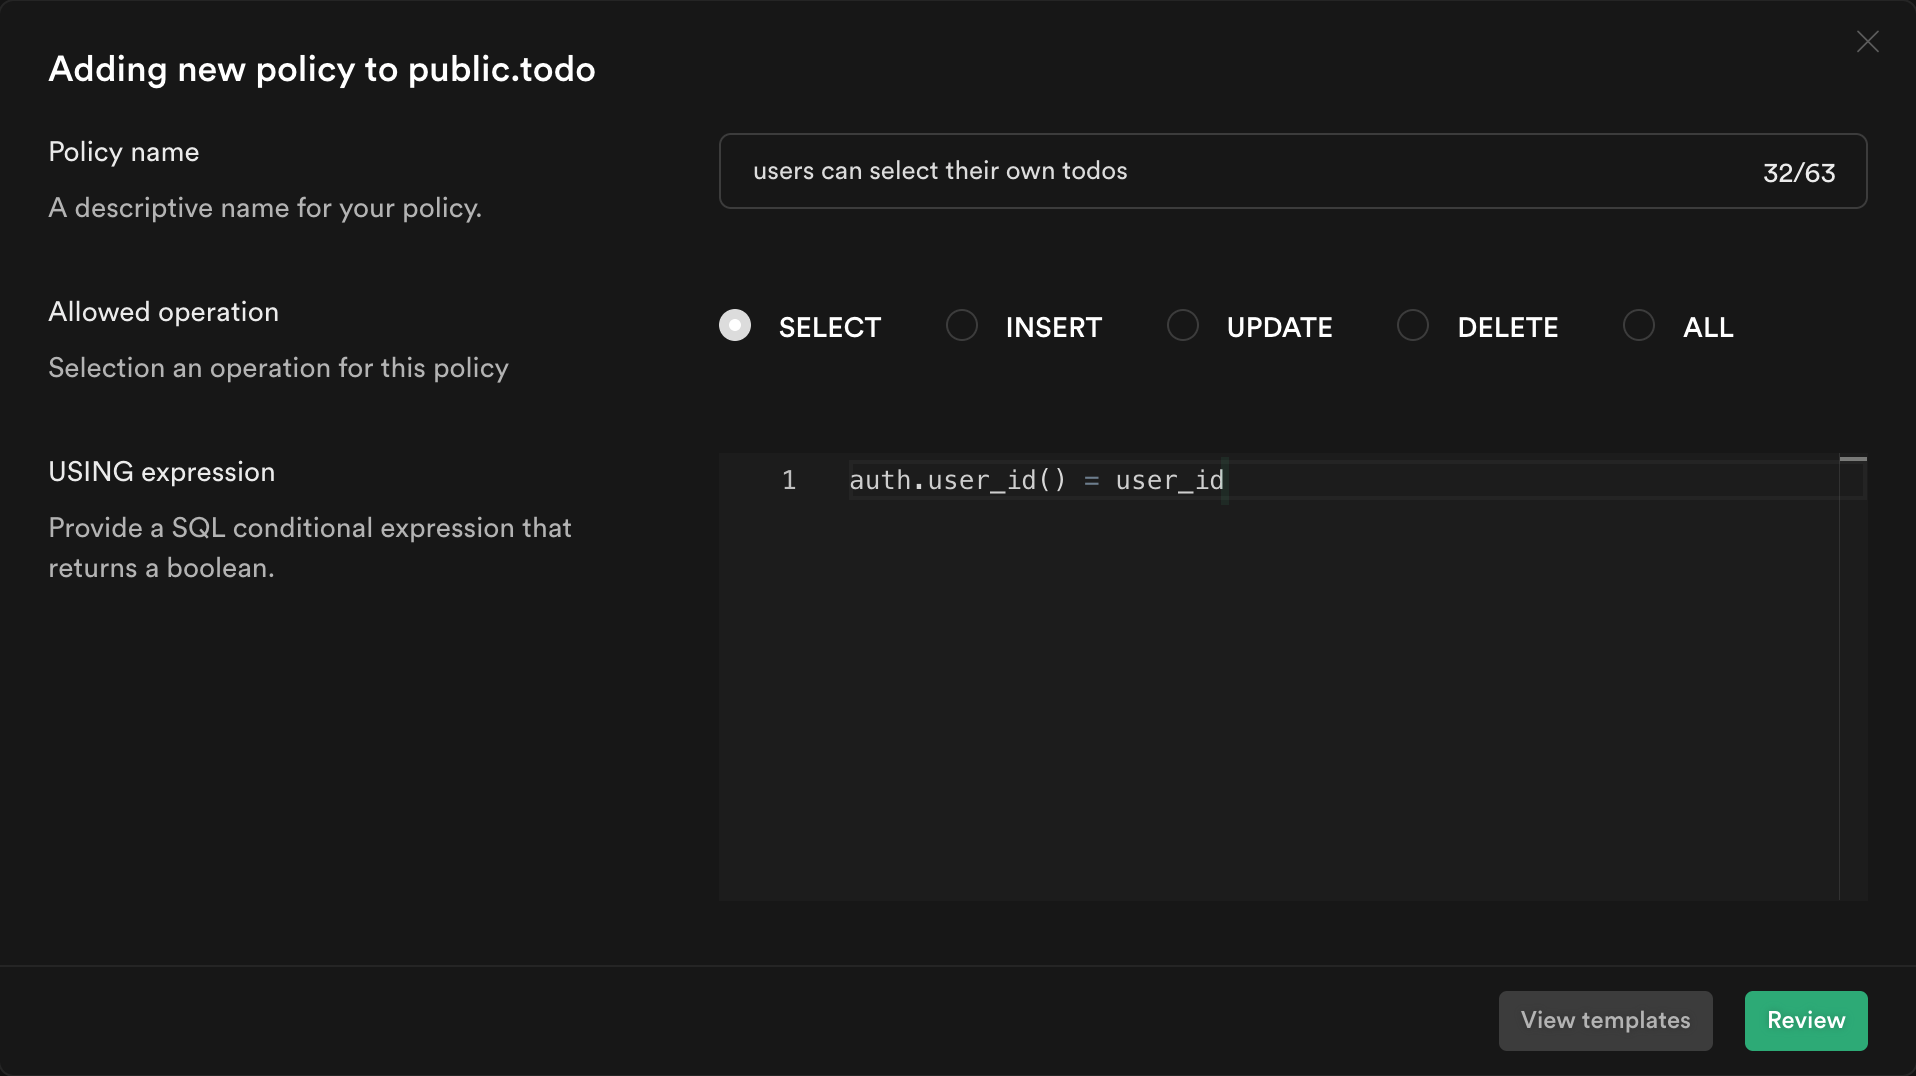
This policy is calling the function we just created to get the currently logged in user's ID auth.user_id() and checking whether this matches the user_id column for the current todo. If it does, then it will allow the user to select it, otherwise it will continue to deny.
Click Review and then Save policy.
Note: To learn more about RLS and policies, check out our deep dive video.
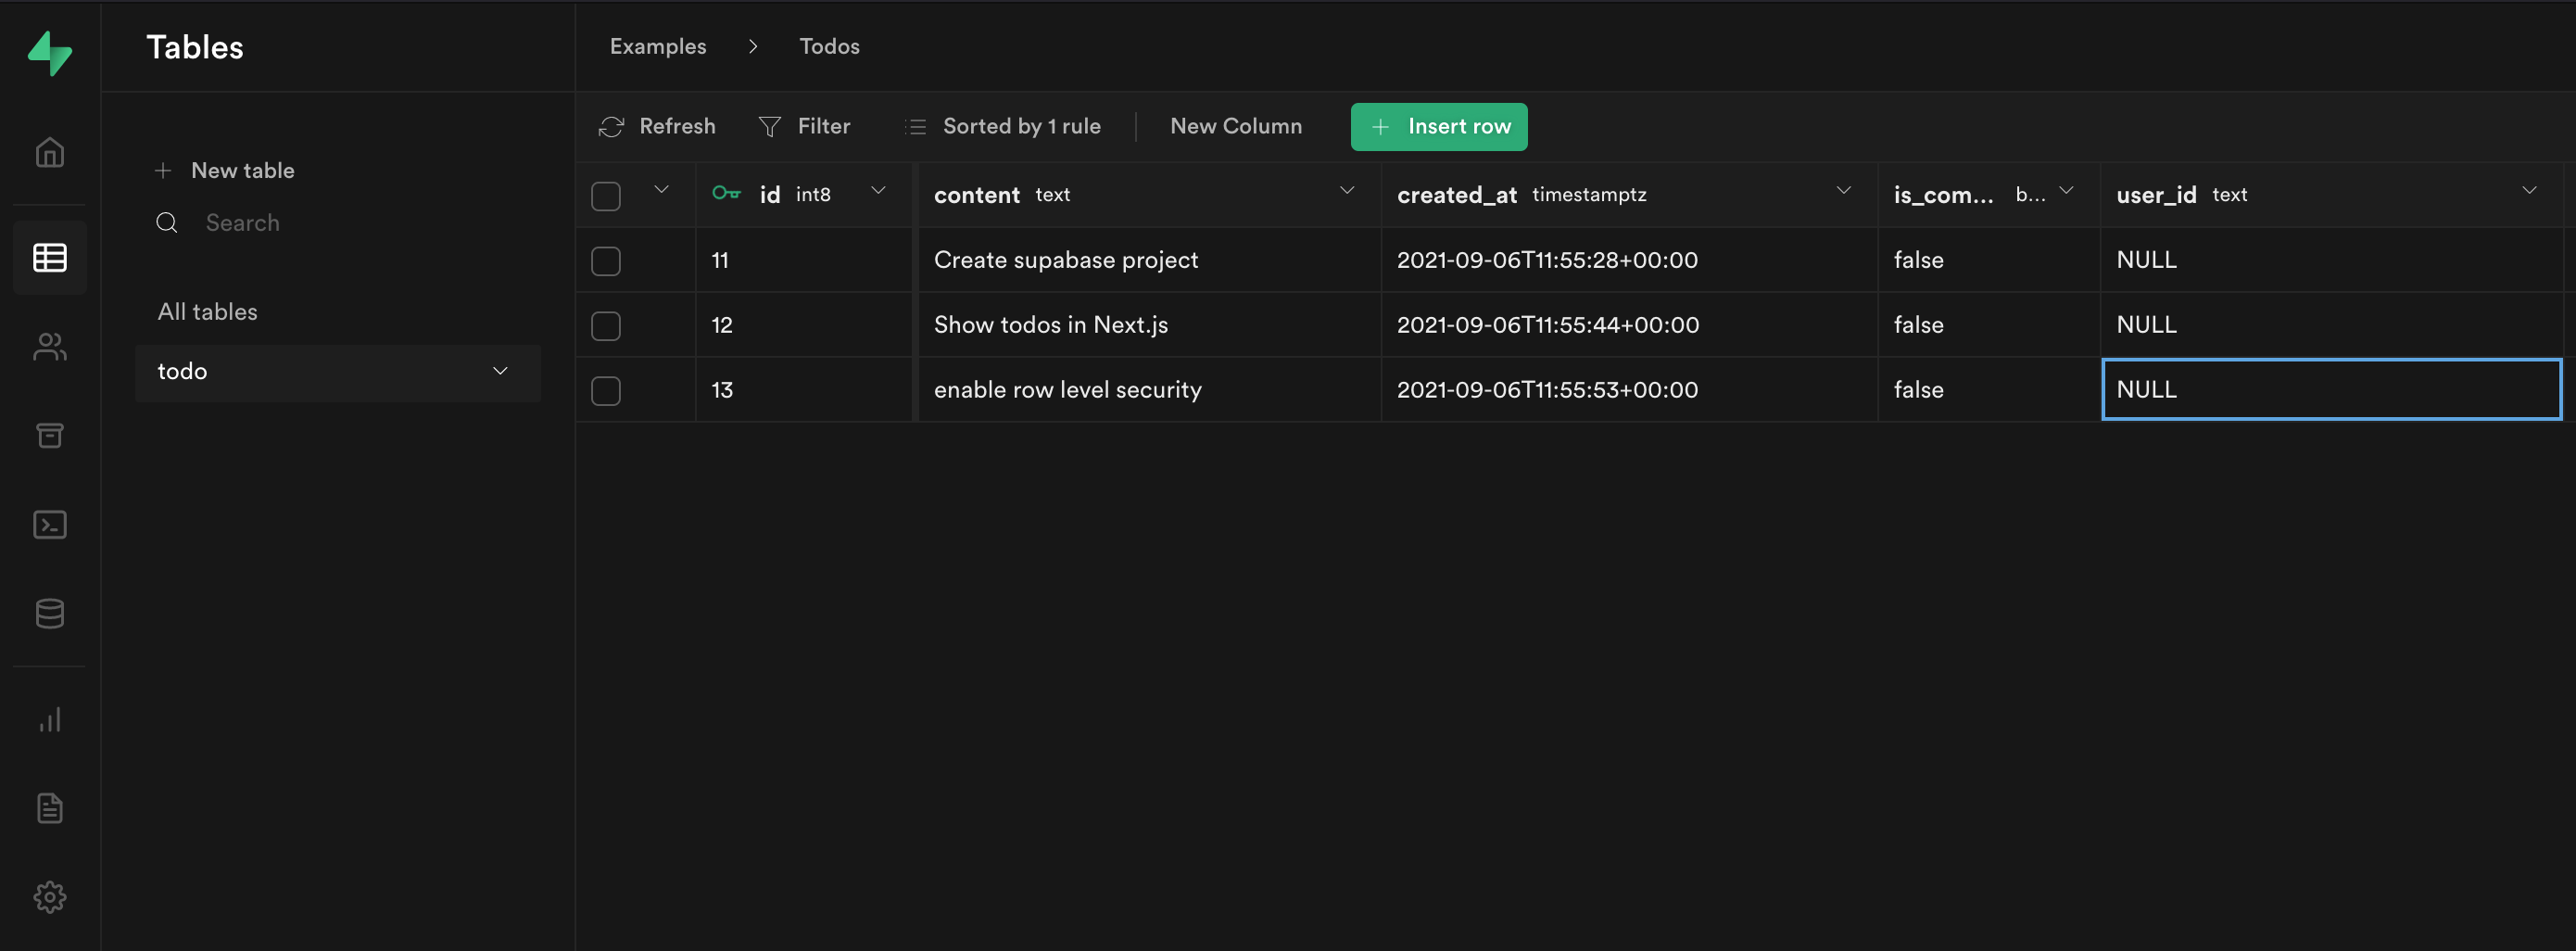
The last thing we need to do is update the user_id columns for our existing todos.
Head back to the Supabase dashboard, and select Table editor from the sidebar.
Each of our user_id columns are set to NULL!
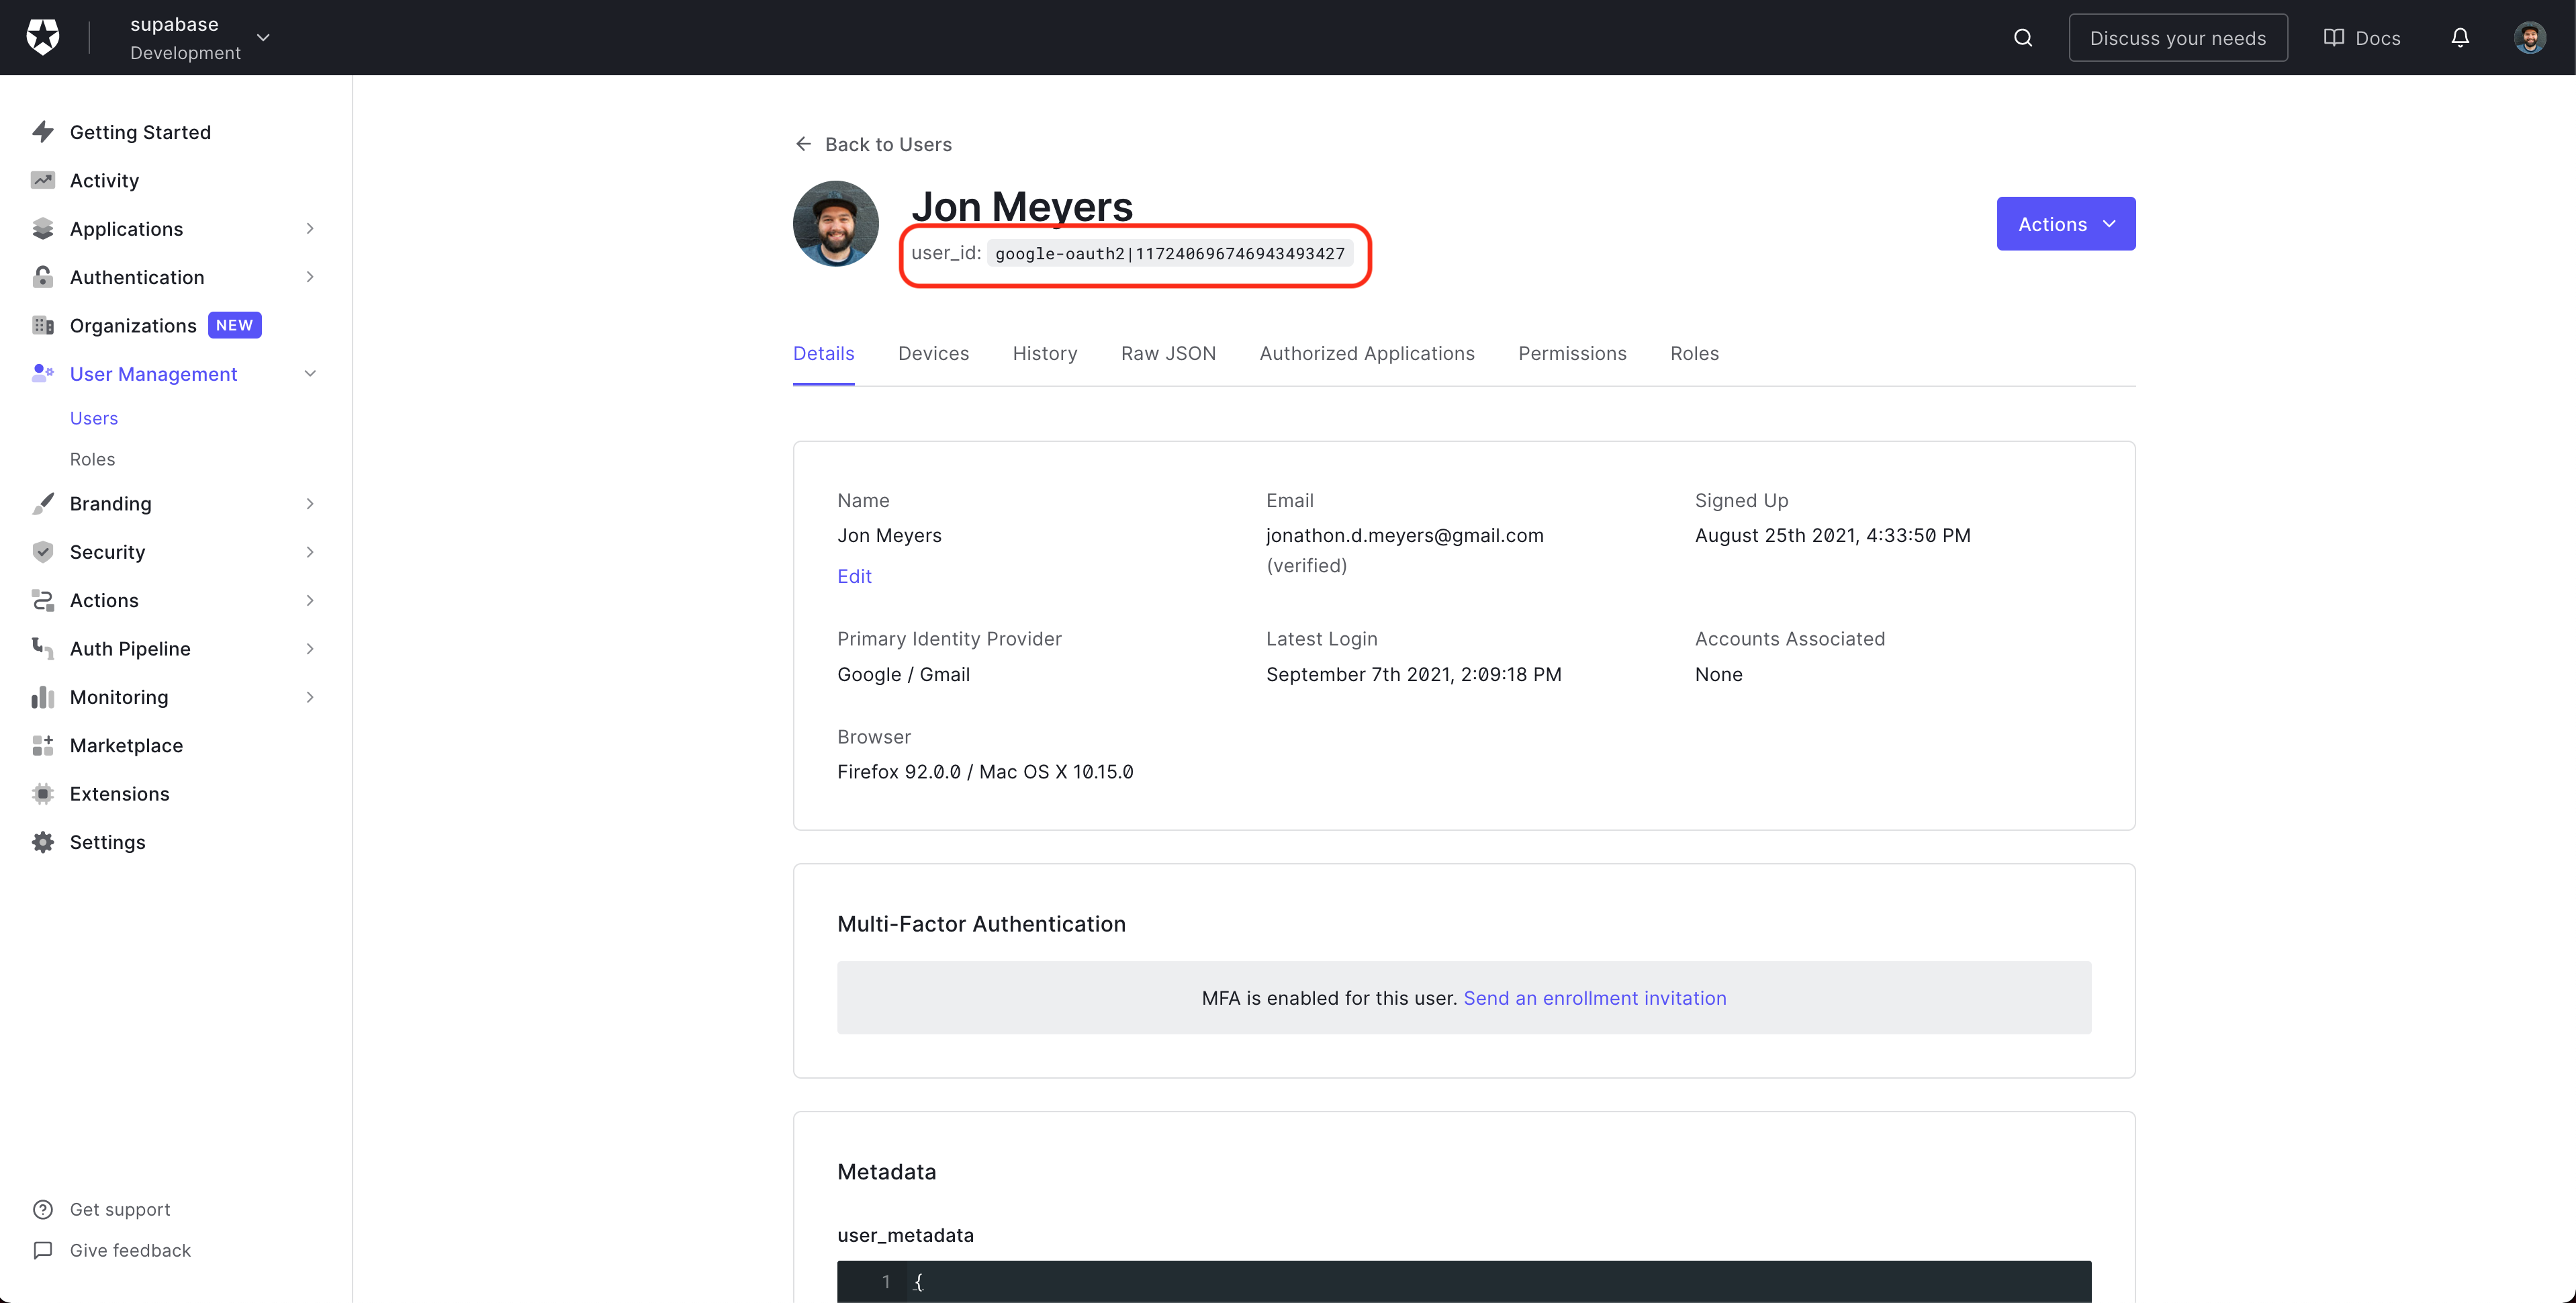
To get the ID for our Auth0 user, head over to the Auth0 dashboard, select User Management from the sidebar, click Users and select your test user.
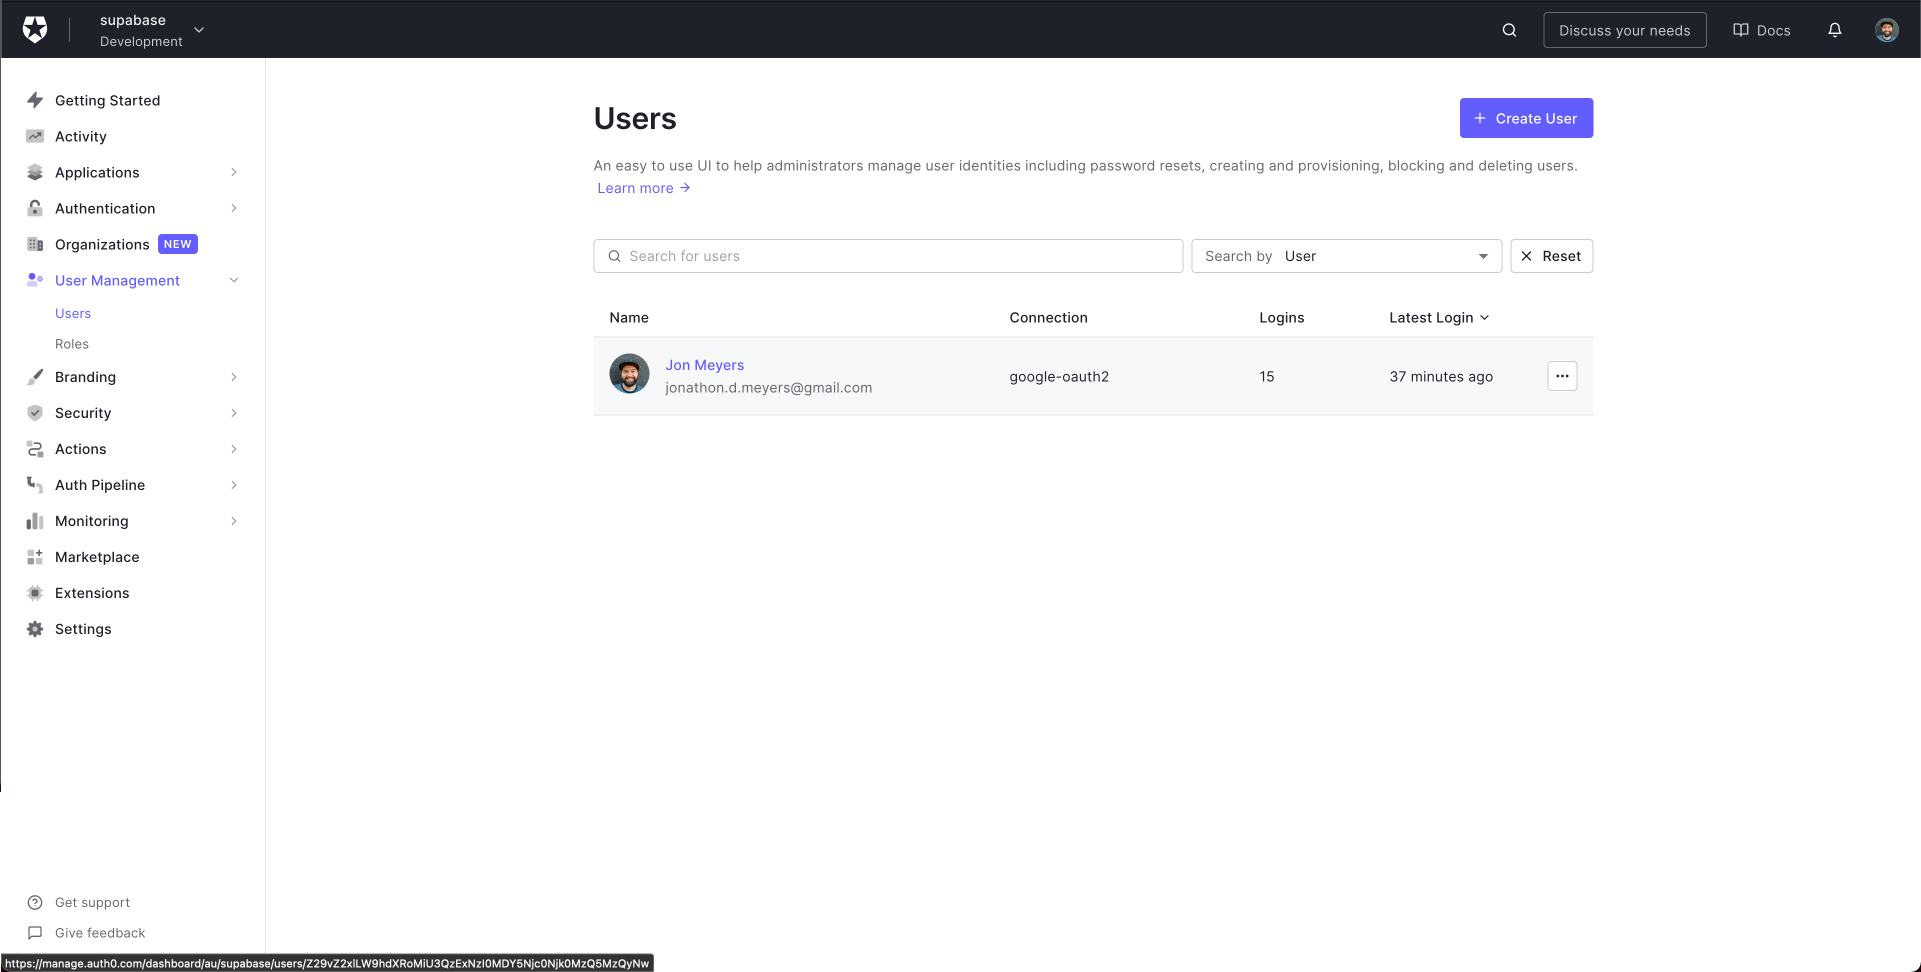
Copy their user_id.
Update each row in Supabase.

Now when we refresh our application, we should finally see our list of todos!
Note: Check out the repo for an example of writing new
todosto Supabase.
Resources
- Auth0 official website.
- Auth0 blog.
- Using Next.js and Auth0 with Supabase article.
- Auth0 community.
- Auth0 documentation.